
The Ultimate Green Screen Resource Guide
My Top Recommendations for Making High-Quality Green Screen Videos

The world of video hardware is a moving target. Every day some manufacturer is introducing a revolutionary new camera or light that will transform the production world. Sometimes the new gear really will make a difference to the videos you create and other times not. Even the good products may not be a good investment for your green screen projects.
In this resource guide I am only going to show you products that work. You don’t have to search Google for gear recommendations and read through hundreds of reviews to figure out what you need.
My recommendations are focused on moderately priced tools that work well in a home office studio environment. These are the essential tools.
Where there are good products at different price points (or different options to choose from) I list more than one recommendation and explain the benefits of each option.
This list will be updated as needed. If you have a recommendation you’d like to share or find that one of the recommended products is no longer available, leave a comment below and let me know.
The Camera
Sony FDR AX-100 Camcorder
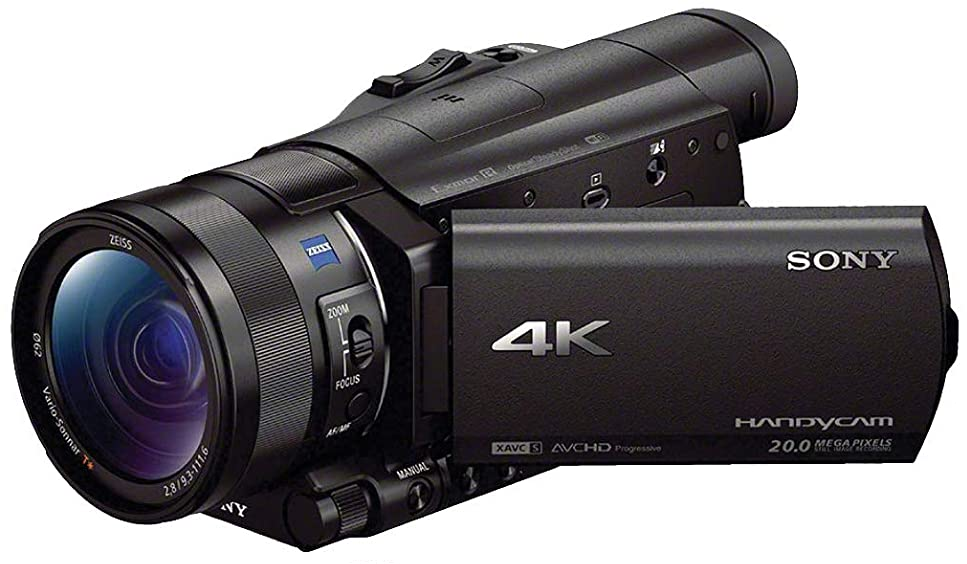
DSLR and mirrorless cameras can produce amazing visuals, but they come with added complexity that doesn’t automatically equal better green screen video. In fact, the shallow depth of field you get with those cameras is bad for green screen work. Why pay extra just so you can spend time messing with lenses and paging through menus trying to find all the controls you need?
A good prosumer level camcorder like the Sony FDR AX-100 is designed for video shooting. All of the essential manual controls are accessible from dedicated buttons on the side of the camera where you can reach them quickly. The flip out screen rotates 180 degrees so you can see your framing when working alone in your studio. This camera also features a high quality Zeiss lens and shoots 4K so you can have extra image detail to work with in post.
Camcorders are are a solid affordable option for green screen projects. This one has a great set of features at a good price.

Blackmagic Design Pocket Cinema Camera 6K
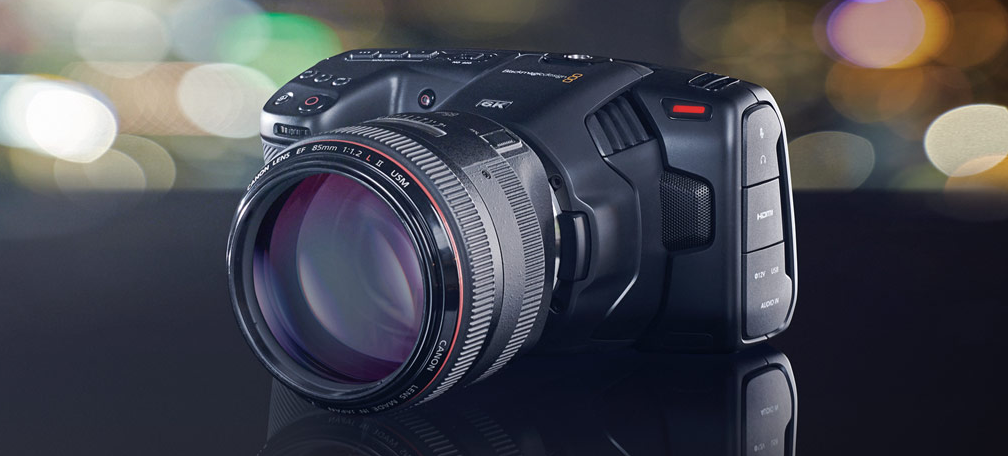
The Pocket Cinema 6K by Blackmagic Design is a Green Screen Monster. It can shoot 6K video with very low noise/grain in a variety of codecs including Blackmagic Raw. Shooting at 6K allows you to reframe your shots without loosing quality and provides extra detail when keying tricky subjects like detailed hair. The EF lens mount gives you a huge range of quality lenses to choose from. It has a very intuitive touch screen menu system and a large 5″ screen. You can even control the camera remotely over bluetooth from your tablet or phone (no need to run back and forth to make adjustments while recording in your studio.)
One of the benefits of a higher end camera is the presence of pro level connectors for things like power, microphones, and monitors. The Pocket Cinema 6K has all that and more. Plus, it comes with a license for a full version of Blackmagic Designs’ DaVinci Resolve Studio software that gives you professional level editing, color correction, audio mixing, and visual effects – which includes an AMAZING set of tools for green screen compositing.
The Pocket Cinema 6K is not perfect. It’s a bit of a battery hog and the screen does not flip out. You’ll need to invest in some additional gear like an external monitor and lenses. 6K Raw footage is big, so you’ll also need to stock up on storage. But, the pros far outweigh the cons on this very affordable professional grade camera.
This camera isn’t for everyone, but if you have the budget, this camera will make a massive difference in the quality of your green screen work.
Green Screen Lights

Lighting green screens can be tricky, specially in small spaces like a home office studio. Large soft lights are the best sources to work with, but they tend to be big. But some newer LED lights hitting the market are perfect for the task (I just added these to my own kit.)
I used to recommend building a set of DIY bank lights using fluorescent shop lights. But now I recommend these rectangular LED lights. They are compact and incredibly light weight which makes them easy to mount. They are dimmable and come with bi-color LED’s so you can adjust the color temperature as well as the brightness. BONUS: no easy-to-break glass tubes filled with mercury vapor!
I recommend purchasing 4 lights. This will allow you to place two lights on each side of the screen (one above the other) to create an even light across the entire screen. You can purchase some brackets that will allow you to clamp a second light onto one stand to reduce clutter.
Monitors
FEELWORLD T7 7 Inch Field Monitor
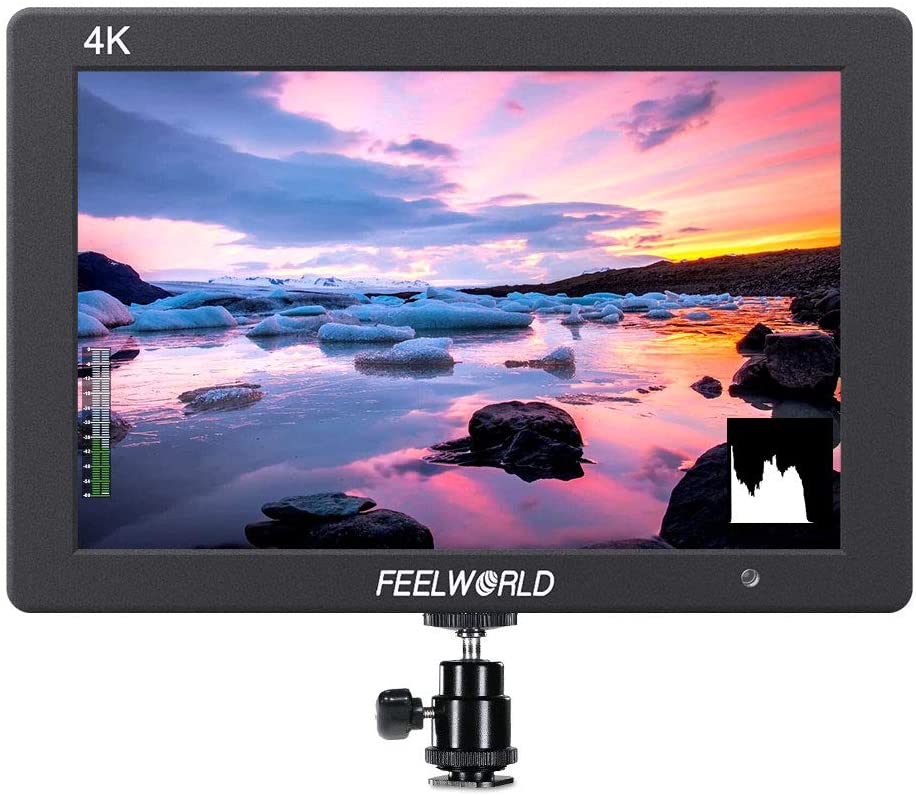
The flip-out screen on your camera isn’t very useful for much more than checking that you are in the frame once the camera is 4 or 5 feet away. If you use a teleprompter with your camera, that little screen will be completely covered. A monitor like this FeelWorld 7 inch field monitor is a big help in making sure you are getting the shots you need.
One bonus of this monitor is that it has several video assist features like false colors, zebra patterns, and focus peaking to help you light your screen evenly and get sharp focus.
This Monitor comes with a cold shoe mount to attach it directly to your camera and screw threads so you can mount it to other supports using other equipment like friction arms.
Tripods
Tripods are an underappreciated video production tool. For many people they are an after thought. They will settle for a super cheap still photo tripod that is hard to setup and level, flimsy when fully extended, and much too short. A good quality tripod will cost as much as (or more than) your camera. But, you will own it for life. There’s an old saying that goes, “you don’t buy a tripod, you marry it!“
Manfrotto MVH502A,546BK-1 Professional Fluid Fluid Head Tripod
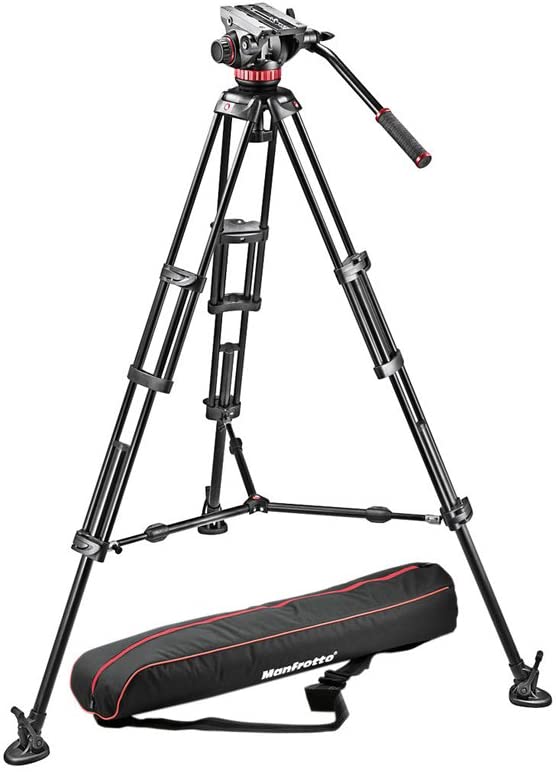
This Manfrotto tripod is a workhorse. The quick-locking telescoping legs extend to a full height of 66.14 inches and the 502 fluid head is rated to hold and balance up to 15.4 pounds. The head mounts onto a 75mm half bowl which allows you to quickly level the head once the legs are extended and locked. You don’t have to level the tripod using the legs.
Thanks to the mid-level spreader, this tripod is also very stable. It’s not the cheapest (or the most expensive) option. But this Manfrotto is a well established professional brand and this tripod is sturdy enough to handle any combination if camera gear you are likely to use.
VariZoom VZ-TK75A Aluminum Fluid Head Tripod
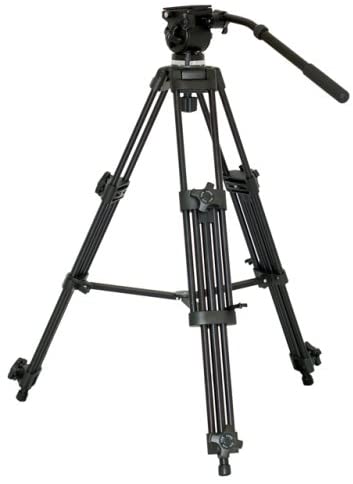
The VariZoom VZ-TK75A is a step down from the Manfrotto in both price and performance, but it is still a good option if you are on a tight budget. It has a 65mm half-bowl mount that lets you level the tripod head separately from the legs. The telescoping legs use turn locks instead of latches which means it takes a little longer to lock everything down once you extend the legs. The fluid head is smooth with adjustable drag settings on the pan and tilt, but you can’t balance the head with a camera mounted on it like you can with more expensive tripods.
This tripod is slightly less convenient than the more expensive Manfrotto, but it is a solid choice if you are working with a tighter budget.
Green Screens
Your selection of a green screen will be heavily influenced by the space you have available and how you plan to use it. If you have a dedicated space to work, painting a wall is one of the best ways to achieve the kind of smooth, flat, evenly colored surface that makes a good screen. But not everyone wants a permanent green wall. Most people opt for a portable screen of some kind. Surprisingly, when you choose a quality screen option, the total price seems to be roughly equal no matter which one you choose.
LimoStudio 6 x 9 ft. Green Muslin Backdrop
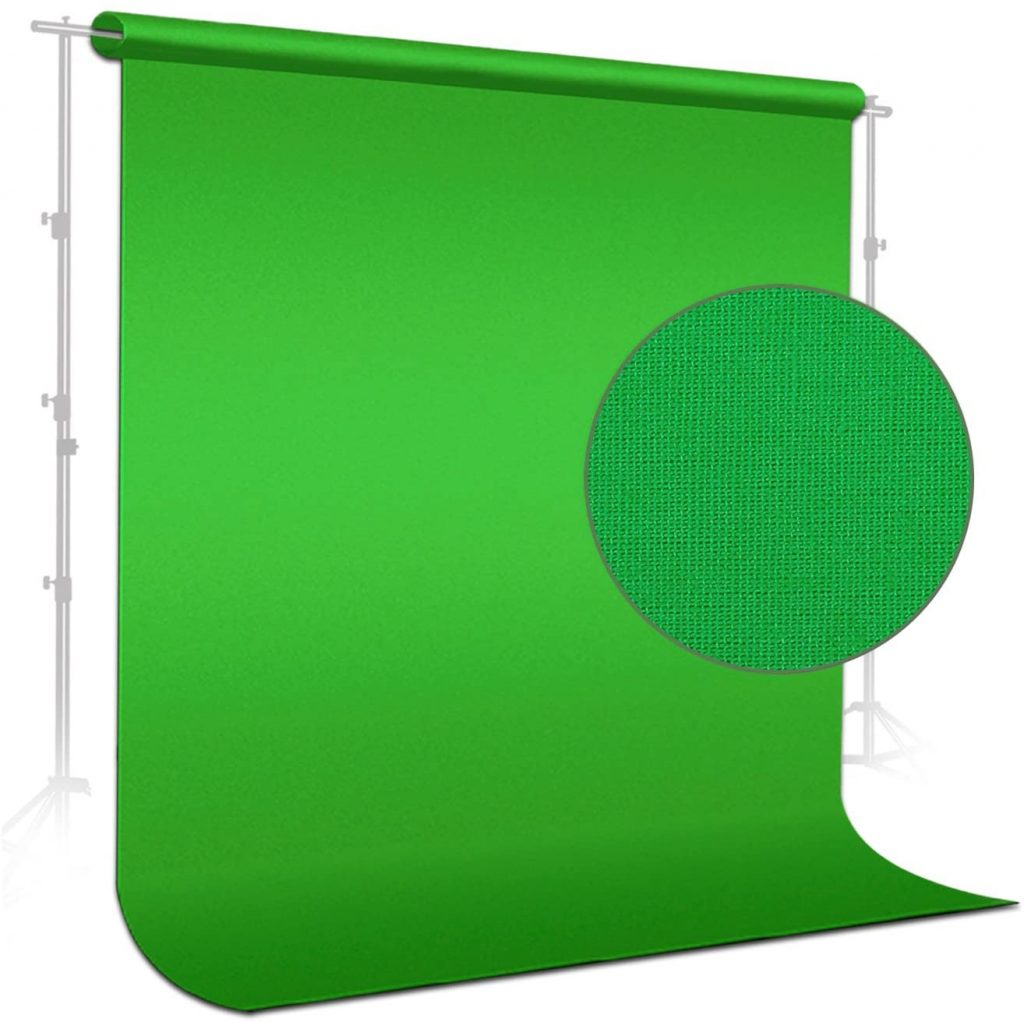
I personally own two muslin fabric backdrops. These are very affordable and do a good job. Muslin tends to wrinkle easily, so I always use clips to stretch the fabric and connect it to the side supports. I also use a fabric steamer to release wrinkles once the screen is set up.
If you are working in a small space, you don’t have to use the stands to hang your screen and use up precious floor space. In my home office, I use push pins to hang my screen from the drywall. This also makes it easy to stretch the screen and remove wrinkles.
Avoid cheap nylon screens. It’s easy to stretch the wrinkles out of nylon, but the surface has a reflective sheen. It’s very hard to light it without creating specular reflections that are impossible to key out in post.
Emart Collapsible Green Screen
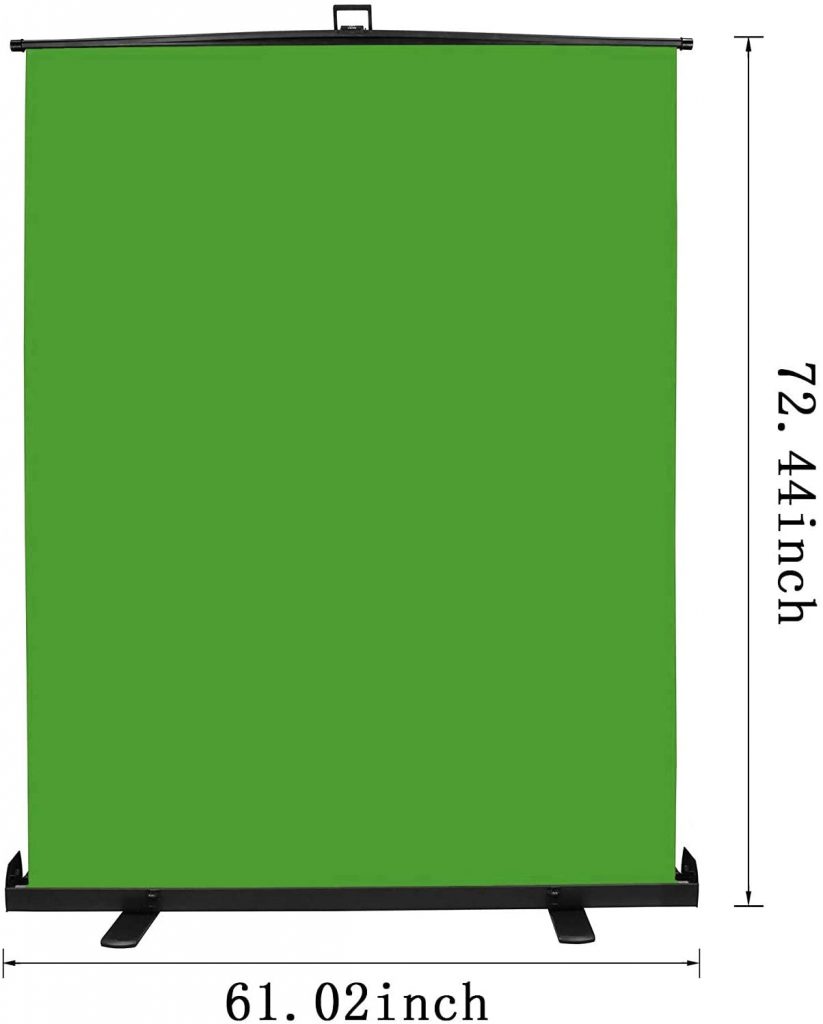
If you mostly do virtual meetings on Zoom or make gaming videos where you overlay yourself on the corner of a game screen, a collapsible green screen is an excellent option. It’s basically the same mechanism as a portable projector screen. You place it on the floor, turn out the support feet, unlatch the lid, and pull up the screen. The whole process takes about 60 seconds and it’s just as fast to take it down.
The major down side if this option is that it is not very wide – about 5 feet. If you stay relatively close to the screen an don’t make lots of wide gestures, that’s not a problem. The convenience is hard to match.
Rosco Chroma Key Matte Green Pain
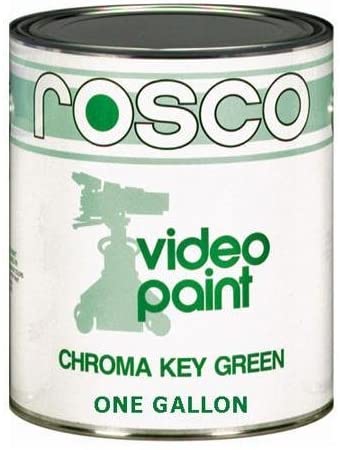
A painted wall it the best and most convenient green screen option if you have the ability to do it. If you choose to go this route, buy the right paint. I wrote an entire article about choosing the best paint for green screen, but the bottom line was that I recommended Rosco Chroma Key Green paint. It is specially formulated to have the optimal color and surface finish for green screen work.
Primary Lights
Large soft light sources are best for lighting people and making them look good. There are lots of amazing (and expensive) options available. My specific recommendations here are focused on lights that work well in very small spaces. That means no Aperture 120D’s with giant softboxes and eliminates all of those super cheap CFL-based light kits. LED panels are the go-to choice.
Neewer 480 LED Video Light Kit with Softboxes
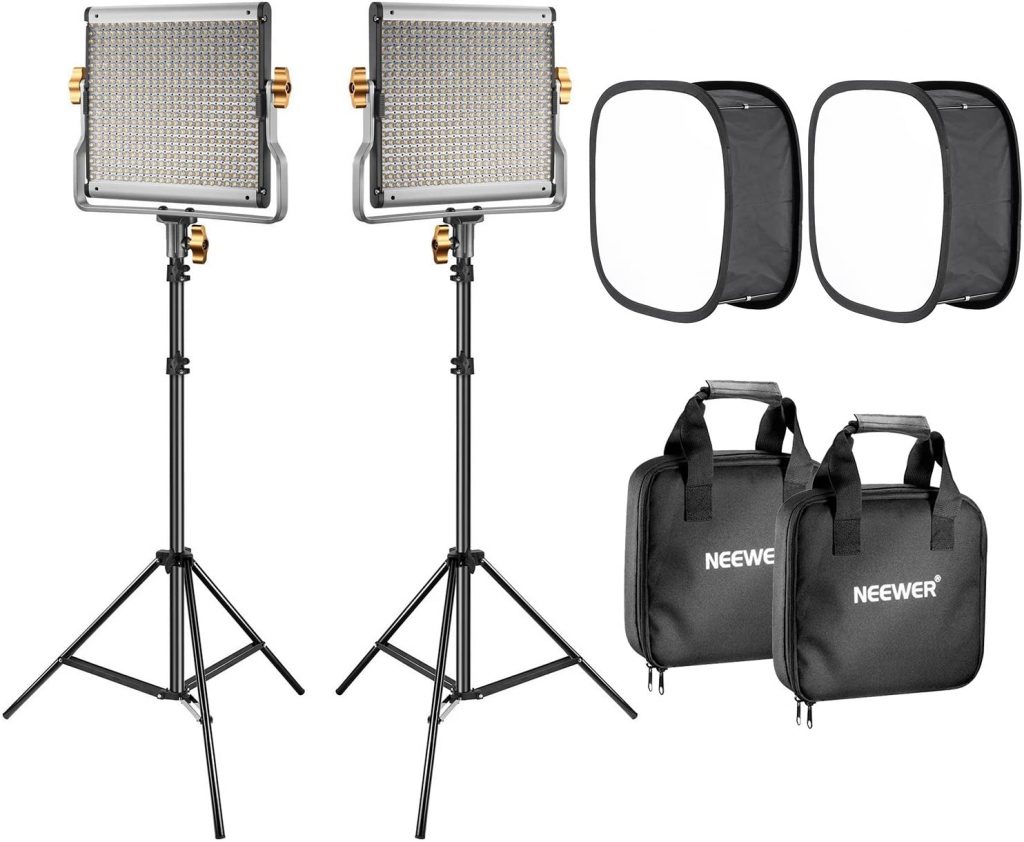
This modestly priced panel kit from Neewer has a yolk-base mounting design which is very versatile if you choose to mount them with some of the rigging gear listed below. The also come with soft boxes. These lights are dimmable, have a good CRI rating for color accuracy, and are bi-color so you can adjust the color temperature
Falcon Eyes Flexible LED Light with Softbox and Grid
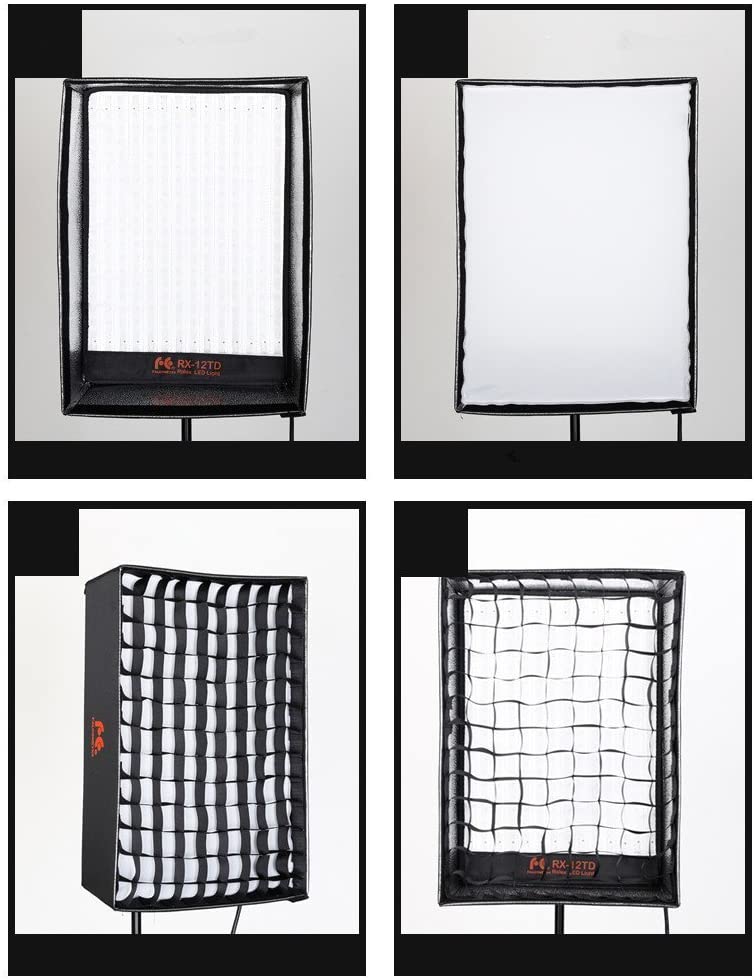
These flexible panel lights from Falcon Eyes are amazing. The LED’s are mounted to a flexible surface that can be rolled up. In this configuration a lightweight frame holds the panel flat and provides the mounting point. The soft box attaches to the panel and includes grids. Soft lights spread light in a very wide pattern and the grids help to control some of the light that would spill off to the sides. This is very helpful when trying to avoid light and shadows from your primary lights hitting your green screen.
These lights are also incredibly bright for their size.
These Falcon Eyes lights are NOT cheap, but if you have the budget, they are amazingly useful.
Mounting Hardware
Getting all your lights and screens in the right places requires lots of stands, poles, and boom arms. The typical stand that comes with a video light today takes up a lot of floor space and is often made of flimsy lightweight materials. If you work in snug spaces, there are better options.
If you plan to setup a permanent studio, you can save even more space by mounting lights to walls and ceilings. This section of the guide is here to introduce you to some of the tools available for mounting your equipment. There is a whole industry devoted to thinking up clever ways to mount lighting gear. In Hollywood they call this Grip Gear.
Neewer 10′ Grip Stand w/Boom Arm
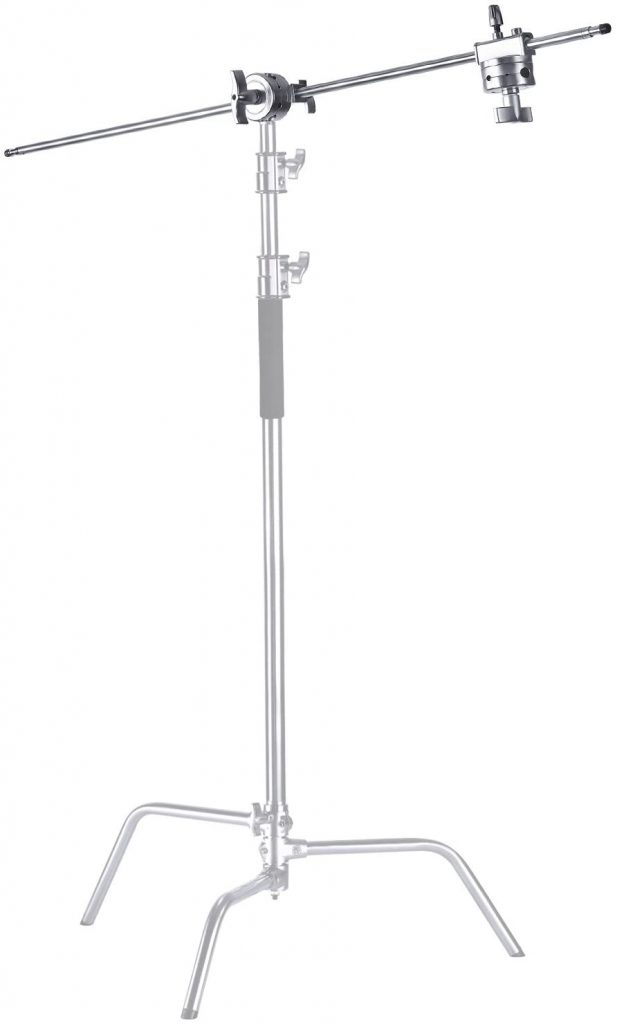
Grip stands are a staple tool in the movie business. The are sturdy, adjustable, and capable of doing a wide range of tasks. The legs can be adjusted to fit close to a wall or on uneven surfaces and are designed to hold sandbags to secure them from tipping over. The included boom arm makes it easy to rig an overhead light or microphone. Adding a few of these to your kit will give you tons of flexibility when setting up your studio.
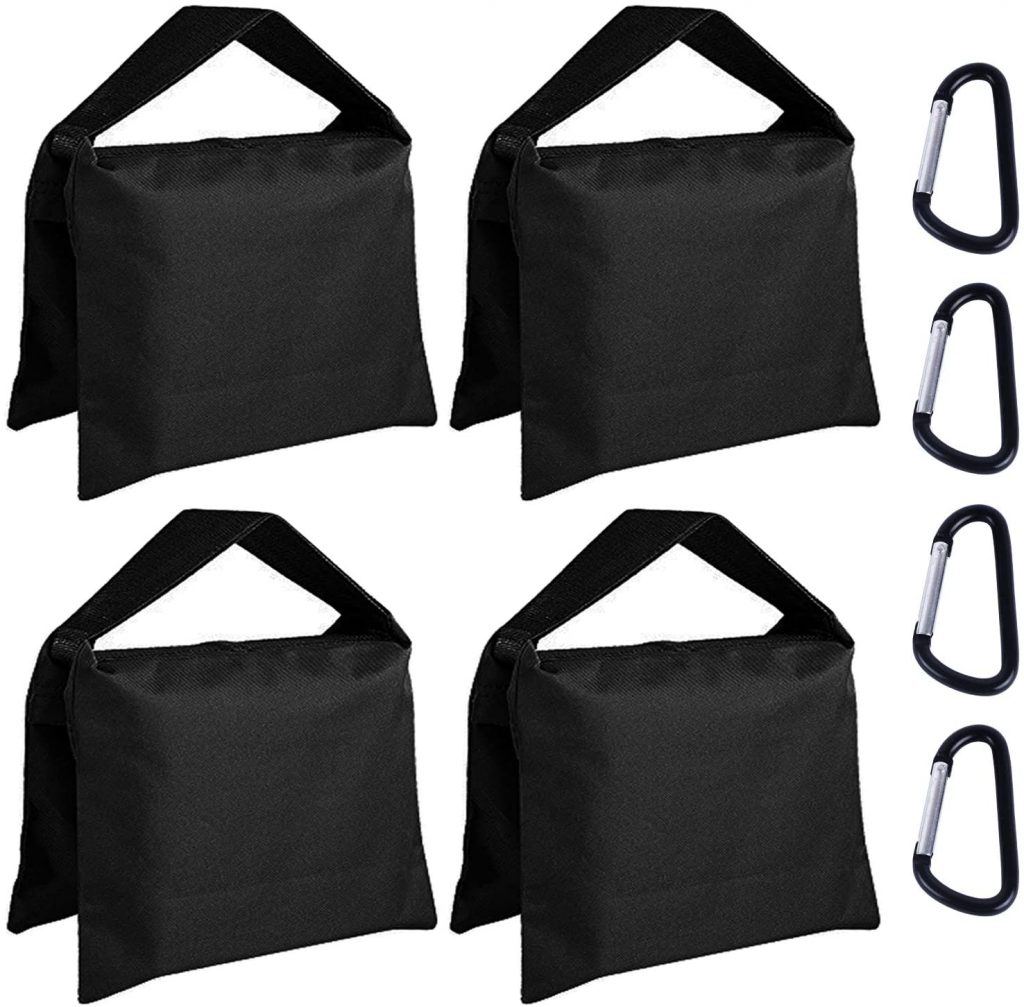
Heavy Duty Saddle Sandbags
Adjustable Boom Arm Wall Mount
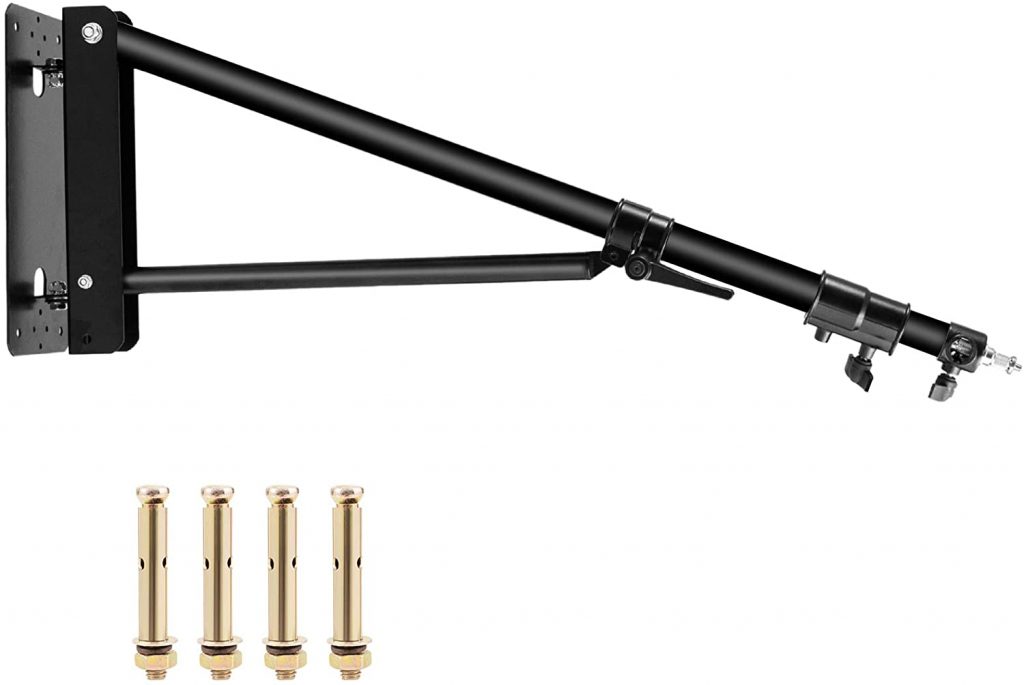
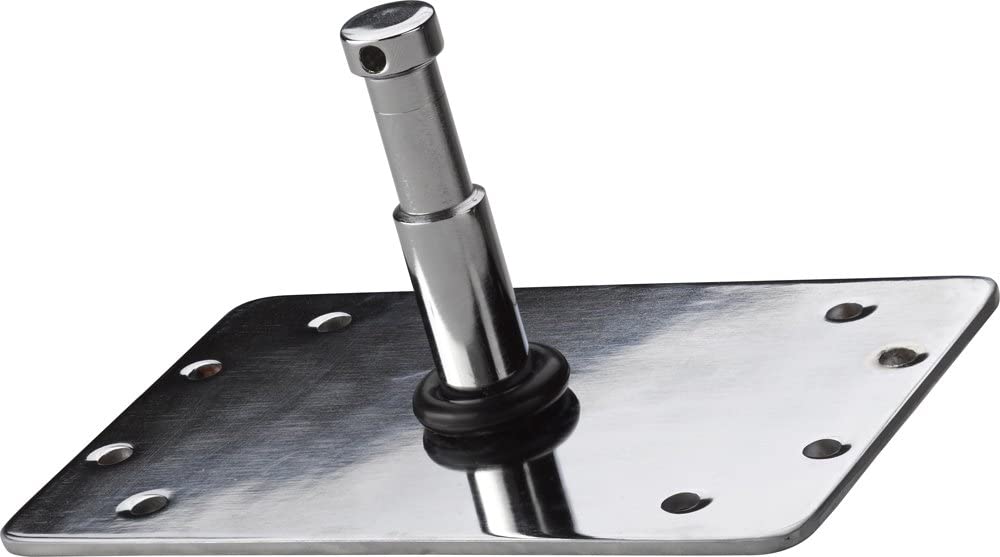
Kupo Baby Wall Plate
Neewer Wall/Ceiling Mounting Plate
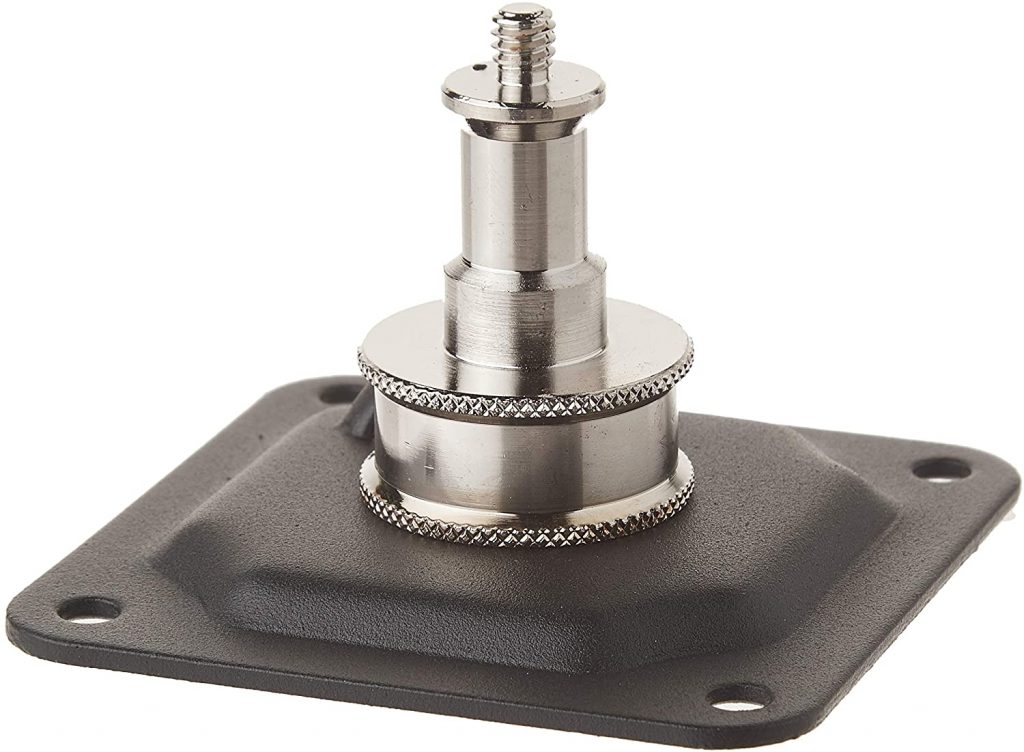
This mounting plate by Neewer is smaller than the one from Kupo and more suitable for lighter gear. The stud has threads on the end which are really handy for attaching small LED panels that often come with hot shoe mounts that have a threaded socket underneath. I use a small LED panel as a hair light that has this exact mounting setup.
Manfrotto Autopole

The Autopole is a brilliant little device. If you want to eliminate light stands cluttering up the floor without drilling holes in the wall, the Autopole has you covered. This is like a heavy duty shower curtain pole. You expand it to touch two walls (or the floor and ceiling) and then lock the clamp. Friction holds the pole in place and then you can use clamps and hangers to rig lights to the pole. When you are done, remove the rigging, collapse the pole, and no one will ever know you had a studio setup.
This is an amazingly useful device and a miracle when working in very small spaces.
Manfrotto Super Clamp
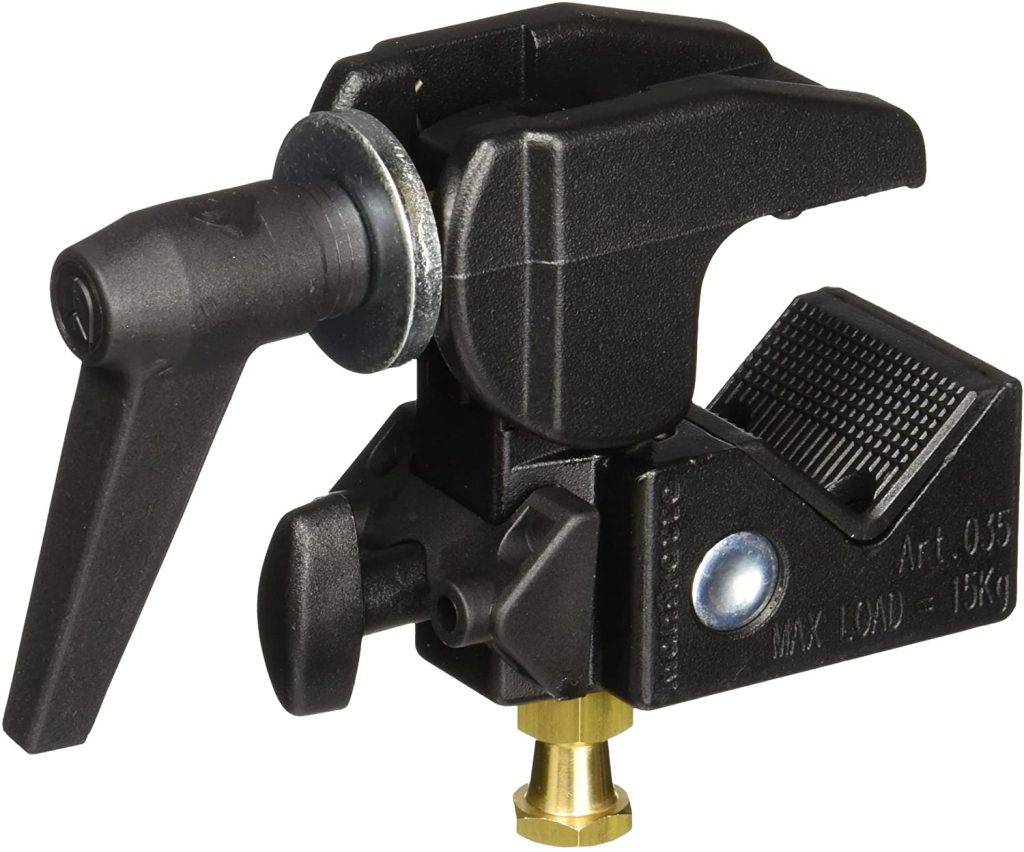
The Super Clamp is another versatile tool for rigging in small spaces. It is designed to clamp on to poles, c-stands, light stands, and the edges of tables or shelves and adds a mounting stud you can use to hook lights and other gear onto. This lets you mount things to an Autopole or add additional lights to a single light stand. You can swap out the mounting stud for other connections if needed.
I always like to have a few clamps on hand to reduce clutter in the studio.
SMALLRIG Articulating Magic Arm
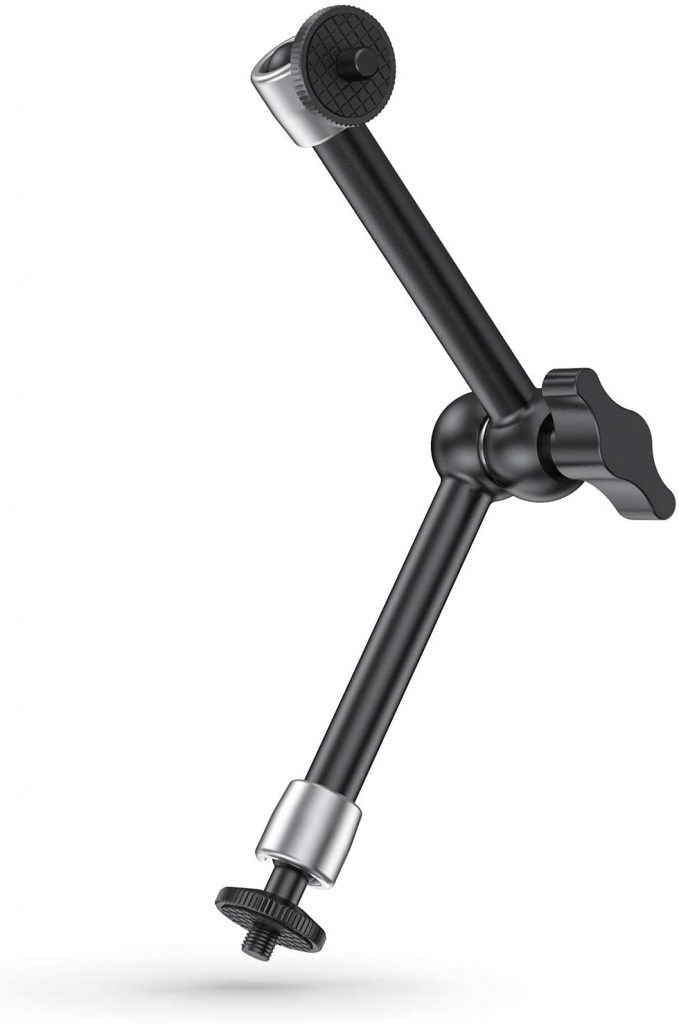
Friction arms, like this model from Smallrig, are often used to rig attachments to cameras. Clamp this to a leg of your tripod and you can easily attach your external monitor. Then, you loosen the thumb screw, position the monitor where you want it, and tighten it back up. The arm locks in place.
I’ve also used friction arms to mount lights to my camera. These mounts are best for lighter weight gear.
Software
There was a time not long ago when I might have made two or three (or more) software recommendations depending on your budget and the computer system you use.
Not anymore!
Blackmagic Design’s DaVinci Resolve software is now the only recommendation I make. First, it’s free – as in costs nothing! They have released a highly capable free version of the software with few limitations. And this is not some crippled version of the software. There is a set of extremely powerful keying tools built into the free version. In my opinion, they are better than to tools built into Adobe Premiere and After Effects (I have been an Adobe user since the late 1990’s, so I’m familiar with the software.) But Resolve also has great editing tools, world class color correction tools, motion graphics tools, and award winning audio mixing tools built into this software.
The next reason I recommend it is that it is available on Windows, Mac, and Linux. No matter what computer you have, there’s a version for you.
Finally, the upgrade to the full version is a flat fee of just $299. I’m sick of ever single tool I use cramming subscription fees down my throat. Adobe’s subscription plan is currently $635.99/year. The software is good (and you get a lot of extras) but that’s a pretty hefty bill. And if you stop paying, everything goes away. You own nothing. There are no free versions of any Adobe software (at least nothing worth using.)
So, DaVinci Resolve is now my favorite!
Open Broadcast Software (OBS)
Okay, I lied. I recommend one other software package but it’s very different than DaVinci Resolve and serves a different purpose. That software is called OBS Studio.
OBS Studio is focused on livestreaming and not video editing. It has a fairly rudimentary set of chroma tools built in and you are not going to get Hollywood-style results from it. But, if you are using your green screen to overlay yourself on a gaming screen or in the corner of the frame during a software tutorial or a reaction video, this is the software to have.
Like Resolve, OBS Studio is both free to use and cross platform compatible. It can be used both for livestreaming and recording to your hard drive. I frequently use it for screen capturing on my computer.
The Ultimate Green Screen Guide

Well, those are my current recommendations for green screen gear. There are a few things to buy, but the list is not outrageous given the benefits you’ll get in return. You won’t need everything on the list to get up and running, so pick out the things that work best for your unique studio space.
Putting together a studio in the real world is not effortless. But, if you really want to do excellent green screen video, you can make it happen. Just roll up your sleeves and get to it.
If you have any questions about the equipment I recommended or how to set it all up, leave a comment below and I’ll do my best to help you sort it all out.
Check out these related articles:
The Ultimate Green Screen Resource Guide
Become a Home Office Video Lighting Instant Expert!
How To Setup a Home Office Green Screen Studio
How to Build a YouTube Channel and Publish Videos That Get Views
6 Easy Ways To Improve The Sound of Your Videos
Pingback: Hollywood-Style Green Screen Removal – Andrew Seltz: The Go-To Guy!
Hey Andrew… Excellent Advice! All your suggestions and recommendations (with lower priced options) are truly valuable and On target! Having worked in Live Action film production in Los Angeles for over 40 years, it’s a constantly-changing and evolving atmosphere and arena of innovations, but these are all Solid recommendations for the beginner to the Pro-Amateur to “ratchet up” their Game to the next level. Good job! All the best to you & yours!
Thanks for the kind words, David. It’s amazing how fast this world changes with new tech. There always seems to be a better camera, better lights, and an amazing new software tool to play with!