Home Office Video Lighting – An Instant Expert Guide
|
|
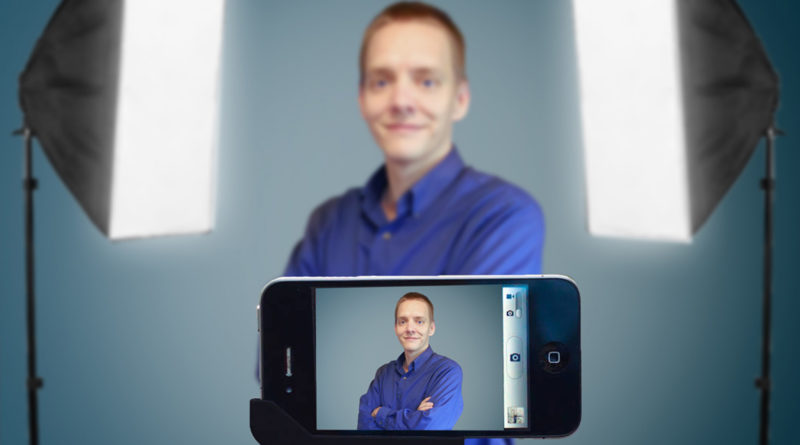
 The web is full of videos that just look dreadful. The people in them look awful and the reason is usually that they just didn’t put any thought or effort into lighting. Sometimes the problem is overhead lights in a room causing deep shadows on faces making them hard to see. Other times people are being lit by their computer screens because the rest of the room is so dark, and the color of the light from the screen makes their skin look sickly. But it doesn’t have to be that way.
Making your web video look good is not hard… once you find a knowledgeable person to show you a couple little secrets.
I’ve been producing and shooting film and video professionally for over 19 years – I’m even listed in IMDB.com for a low-budget feature film I helped shoot and produce called “Dark Chamber†and a children’s television show called “Kingsley’s Meadow†where I served as the Executive in Charge of Production.
I have also worked on dozens of productions in the corporate world and shot more ‘talking head’ interviews than I care to remember – lots of green screen too!
There is a formula for shooting interviews. You need a few basic pieces of lighting equipment and you can setup a good looking interview shot quickly – by just following the formula.
I’m about to teach you a simple formula for making your videos for the web look like they were lit by a pro. The cost for equipment should be right around $50-$75 and it will work with any camera.
Don’t be fooled by the simplicity of the formula I’m about to show you or the low cost of this report. This is EXTREMELY valuable information. My production consulting rate is $70 per hour to teach this material and $700 a day to actually come out and set it all up for a client. (I did spend well over 19 years learning how and why all this stuff works – and practicing.)
You might be wondering why I’m giving away this hard-won knowledge. Quite frankly, I’m tired of all the awful-looking videos polluting the web. This is my small contribution to beautifying the Internet. Plus, I get a lot of questions from Udemy instructors and entrepreneurs about how to setup the lighting for their home offices. Now, I can just link here!
If you really do need to consult with me about a more advanced video project, just shoot me an email and we’ll work something out.
Check out these related articles:
How To Setup a Home Office Green Screen Studio
Green Screen Paint – How to Pick the Right One
How to Build a YouTube Channel and Publish Videos That Get Views
6 Easy Ways To Improve The Sound of Your Videos
Instant Expert Crash Course: Lighting
Before we jump into the 5-Step Lighting System, I want to give you a crash course in lighting so you will have a basic idea of how things work. There are four fundamental concepts about light that will instantly make you more knowledgeable than most people attempting to create videos. They are:
- The Intensity of Light
- The Color of Light
- The Quality of Light
- Three-Point Lighting Setup
Intensity
Intensity is the most familiar and well understood concept. It is just a matter of how bright the light is. The critical realization for video production is that you need more intense lighting for creating videos than you would chose in other situations. Video cameras are less sensitive to light than the human eye, so you need more of it to generate a clean well lit video image. Cheap cameras make better images with more light. All cameras make worse images when the light is too low. Your room should seem a bit ‘too bright’ when you are shooting videos.
Color
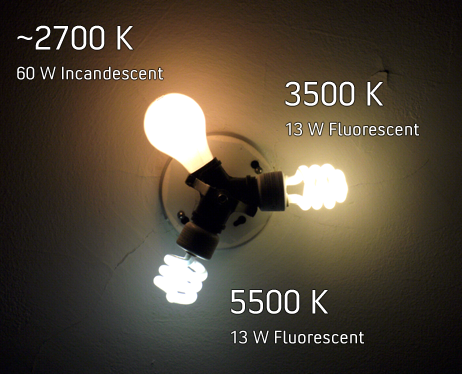 Most people don’t think about regular light having a color, but it does. The warm-white lights used in typical home lighting fixtures have an overall orange tint and bright sunlight has a very cool bluish tint. Professionals measure this color range using something called the Kelvin Scale. The warm-white color is roughly 3200K and the cool blue sunlight is about 6500K. Your eye rapidly adjusts for changes in color temperature, so you hardly notice it. But, your camera has to pick its color temperature setting using a process called white balancing. Cheap cameras let you choose between daylight and interior light (the cool blue or warm-white color ranges.) Better cameras will allow you to create a custom white balance tuned to the exact lighting conditions you are working in (you place a white object in the scene, aim your camera at it, and the camera analyzes the image and adjusts its internal color settings.)
Your main job in lighting your video is to avoid mixing lights with different color temperatures. If you are working in a space with lots of sunlight streaming in, use daylight balanced lights and swap out the bulbs in any visible lamps while you are shooting. My home office is entirely lit with daylight balanced lights.
 There is one extra color related measurement that is important when choosing fluorescent and LED lights. It is the Color Rendering Index (CRI). This is a scale from 0-100 and measures how accurately a light source reproduces the full spectrum of visible light. Low CRI lights will not accurately reproduce the colors in your shot and can often add a color tint. Those sodium-vapor lights used in lots of parking lots make everything look orange because their CRI of 20-30 is terrible. Even if you try to white balance the camera to a low CRI source, colors will still come out looking wrong. Any source with a CRI over 90 will do a good job for video (but many lights at your local home center will have a much lower rating – so watch out.)
Quality
The quality of a light source is described as either hard or soft. Hard lights create harsh shadows and emphasize surface imperfections when used to light people. Soft lights create subtle shadow transitions and tend to be very flattering when used to light people.
Hard light is created by very small intense sources (think the sun on a clear day) and soft light is created by spreading out the light so it radiates from a larger surface (like how clouds spread out the light of the sun on an overcast day.
There are a variety of ways to create soft light for a video production. You can aim a hard light at a white surface and it will bounce off the surface and turn the whole surface into a large soft light source. You can shine a hard light through a translucent surface like a diffusion gel and spread it out the way clouds affect sunlight. Or, you can use a light source the radiates light from a large surface area like LED light panels or fluorescent tubes.
Three-Point Lighting Setup
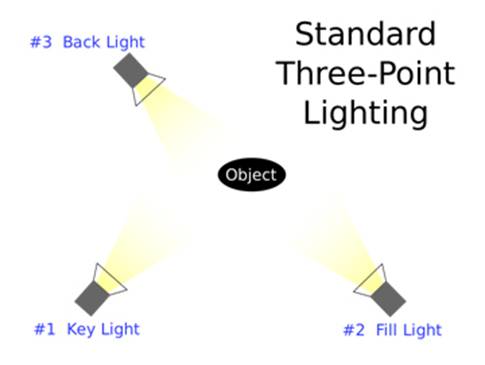 This final concept is the fundamental lighting pattern taught to all students studying video production. When lighting a person you use three lights. You place one strong light in front of them and off to one side of the camera called the key light. You place another light in front on the opposite side of the camera called the fill light. This second light fills in the shadows and controls contrast. The third light is the back/hair light. It goes above and behind the person and shines down on their shoulders and hair. This creates a strong edge of light that helps to separate the person from the background.
You have now learned a huge chunk of what I was taught during my first semester of film school. The rest of the process is a matter of selecting your equipment and experimenting with the exact placements of the lights. Next I will lay out a rock solid 5-Step Lighting System you can copy to get great results in your home office studio with a very low budget. Copy me and look great!
The 5 Step Lighting System
As I mentioned in the introduction, this system is not very complicated. My goal isn’t to show off all the fancy lighting tricks I’ve learned over the years. I just want to give you a system that is easy to follow, uses readily available materials, and makes your videos stand out from the crowd.
I’ve broken down the whole thing into 5 steps and this is the bullet point version of the whole process:
- Pickup a three of Chinese paper lanterns (the round, white, rice paper jobs.)
- Light them with daylight balanced screw-in fluorescent bulbs (CFL)
- Place one paper lantern on each side of the camera just out of view
- Place the third lantern (lit with a slightly higher wattage bulb) above and behind the subject to provide a little ‘edge light’ on the shoulders and hair and also to illuminate the background
- Hang a muslin backdrop from the ceiling 4-10 feet behind you (if you are shooting in a small space, just tack the backdrop to the far wall)
This whole thing should cost between $30-$60 if you use a bed sheet for your backdrop and shop around for the lanterns and bulbs.
This creates better looking video because the paper lanterns create what is known in the professional production word as ‘soft light.’ I’m not going to try and explain why it works – just trust me. When you see the effect you’ll understand why professional cinematographers and photographers LOVE soft lights.
The daylight CFL bulbs serve two purposes. The use less energy and produce less heat (very good features for something that will hang inches from highly flammable paper.) And, since they create the same color of light as daylight, you won’t have the color problems you get with other light bulbs. Fighting bright window light is a huge challenge, so we’ll just work with it instead.
Now, let’s break down each step in a little more detail.
Step 1: Buy Chinese Lanterns
 In many areas, these versatile lights are pretty easy to find. I’ve setup a special Amazon Shop for readers of this report and pre-selected appropriate equipment. If you have any trouble finding the lanterns locally, go there.
I found my lanterns at the local Pier 1 Imports store. You pay higher retail prices there, but that is a store that nearly always carries these lanterns in stock.
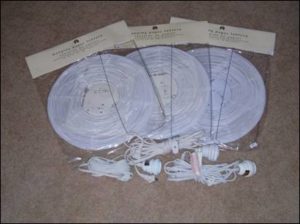
 The lanterns come in 2 parts – the paper shade, and a cord with a light socket on one end for the bulb. Make sure to get a white lantern with no writing on it (some come decorated with Chinese writing and other designs.) I like the 14†size, but a 12†lantern will work just as well and could save you a few dollars. I also purchase a socket splitter for each lantern. This gives you the ability to insert two bulbs in each lantern and boost your light output.
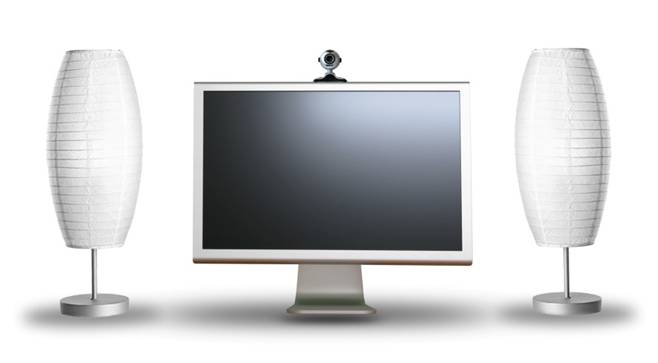
Rice paper table lamps are another excellent option, if you want something to blend in with your room decor a bit (and don’t want to hang stuff from the ceiling.) These lamps can be purchased and placed on either side of your computer monitor so your webcam images are always well lit.
The lamps are more expensive than the lanterns, but a little easier to set up and far more attractive.
If you do choose to purchase free-standing lamps instead of the hanging lanterns, I still recommend buying one of the lanterns to hang behind you for the backlight/backdrop light.
Step 2: Add Daylight Balanced CFL Bulbs
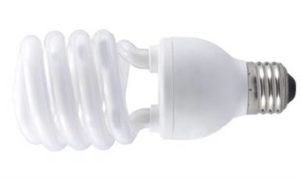 Daylight balanced CFL bulbs are pretty easy to find these days (and much less expensive than they were just a few years ago.) I purchase mine at a local home center – big orange place, there might be one near you. Many locations are phasing out CFL’s in favor of LED based bulb. It is also getting harder to find bulbs with a high CRI. Most are around 83, which will have a negative impact on your skin tones.
 Don’t choose soft-white, bright-white, or any other kind of bulb. Look for the word ‘Daylight’ on the package. Any other kind of bulb will create an orange color when seen in sunlight and your camera can’t adjust for that. Either the lamp light will look orange or the sunlight will look blue. Make sure the bulb has a CRI of at least 90.
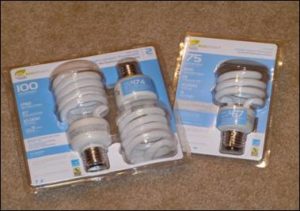
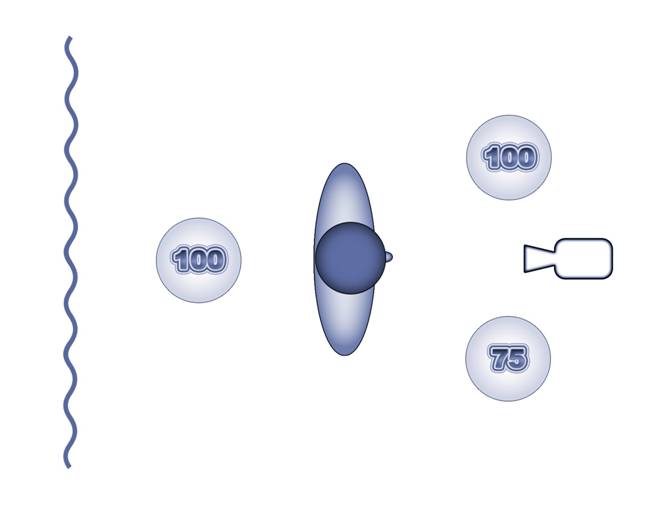
I recommend you get 2 bulbs (4 if you use a splitter) that produce the equivalent of a 100 watt light (or even a little higher if they carry them.) For the other bulb, choose one (or 2) around the equivalent of a 75 watt bulb.
The reason for the lower wattage bulb is to create less brightness on one side of the camera. This allows for some slight shadows which creates something lighting people refer to as ‘modeling’. Again, it’s a good thing – just take my word for it.
Step 3: Place 2 Lanterns at Sides of Camera
 Once you’ve setup the lanterns and placed the bulbs inside, it’s time to start putting things into place. Hang one lantern with the high wattage bulb on one side of the camera and place the lantern with the lower wattage bulb on the opposite side.
The lanterns should be slightly higher than head-height when you are in position to record your video. This will ensure that enough light makes it to your eyes (when people can’t see your eyes, it makes them suspicious.)
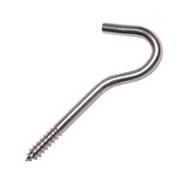
Paper lanterns can be hung from the ceiling using simple screw-in hooks. The lanterns are pretty light weight, even with the bulbs in them. Ask the person wearing the apron at the big orange store for an appropriate size hook and follow the instructions on the package for installation.
Another method of hanging the lights (if screwing in hooks isn’t an option) is to place a long stick or shower curtain rod over where you camera will be. This can be supported with stands on the floor or any other clever rig you can think up. You could build something like this out of plumbing pipe.
Loop the cord for the lantern over the bar to hold the lamp in place and then wrap the rest of the cord around the pipe and down the sides.

Step 4: Place 1 Lantern Above and Behind Subject
Using the same methods described in step three, hang the third lantern (with the higher wattage) bulb, above and behind the position where you will be when recording. Place it close to the ceiling so it won’t be seen.
If the dimensions of your room make it impossible to keep this lantern out of the view of the camera, move it off to one side until it is out of the shot.
This lantern should be about half way between the back of the subject being filmed and the backdrop.
The purpose of this light is to light the edges of the subjects shoulders and hair (to visually separate them from the background) and to light the background/backdrop.
 Step 5: Hang Backdrop (Optional)
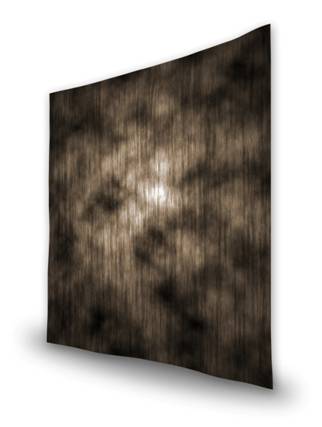 If the room you are recording in is really beautiful, you may not want to use a muslin backdrop. But most of us are working in rooms that aren’t exactly perfect. The fastest way to transform the look of your room is to hang a backdrop and cover it up.
You can spend hundreds of dollars on professional backdrops, but a simple bed sheet will work. Just avoid sheets with patterns on them – you don’t want a busy background competing for attention. The focus of your viewer should be on you.
The backdrop should ideally be 6-8 feet behind the subject, but you often have to compromise on that. Some cameras have a very wide angle lens which would easily show the edges of your backdrop if it is too far away. And, some rooms are just too small to get the backdrop very far away from the subject. So, don’t be afraid to compromise a bit to make this work.
The color of your backdrop is critical – especially if you are using a cheap camera.
Cheap cameras usually have automatic exposure settings. They work by averaging together the overall brightness of what they ‘see’ and adjust the picture to provide the best exposure for detail. The problem comes if you have a very dark or very bright background. The camera will over-compensate for the background and leave the subject over exposed or under exposed.
If you have a camera with manual exposure controls, you can just adjust for the background. Otherwise, the best option is to focus on using a backdrop that is medium toned.
It is also a good idea to avoid intense colors on your backdrop – especially reds.
If you decide to use a sheet for your backdrop, go cheap. The best option is a king-sized flat sheet with a polyester/cotton blend. The poly-blend helps keep the sheet from wrinkling up.
The easiest way to hang the sheet is to attach it to a wall with tacks. If you have to hang it from the ceiling, first attach it to a stick and then hang the stick from the ceiling or prop it up with some kind of floor stands.
With everything in place, you should have something that looks like this:
Upgrading Your Lights
Paper lanterns are amazing, but they do have limitations. First, you have limited options for installing them. They have to hang. You can’t just pop one on a stand and move it around the room. You have to rig up something to hang it from. The second significant limitation is that you waste a lot of photons. The light energy from your lantern radiates out in all directions. Some of it hits your subject, and some lights up the wall behind your camera. If you can get all the light going in the same direction, you will get stronger light from the same set of bulbs.
So, if (or when) you have some extra money to upgrade your home studio lighting, I have a few recommendations for you.
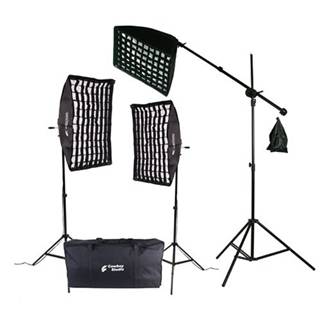 If you have a very tight budget, I recommend getting a low-end CFL softbox kit. These are usually cheap tools imported from China. They can be a pain to setup, and will not hold up to heavy field use. You get what you pay for – cheap materials and poor construction. But, if you set them up once in your studio and leave them, you will get a big bump up in the quality of your videos for well under $200.
These softboxes usually have 1-5 sockets that take standard CFL bulbs. There is a box-like structure around the bulbs that directs the light forward, and a diffusion panel the covers the opening to spread out the light and give it that pleasing ‘soft’ quality. Some kits also come with grids (aka egg crates) that reduce the amount of the light spread to help control light spilling into unwanted areas.
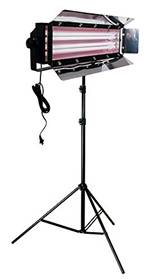 The next level up in lighting gear is the fluorescent light bank. These lights consist of 2 or 4 light tubes in a relatively thin rectangular fixture with attached barn doors. They take up much less room than a softbox and deliver a very similar result. If you are working in a small space, these lights will give you more placement options and remove the need to setup and break down the boxes if you move the lights. The cheaper versions of these lights run about $70-$100 per fixture. Pro versions (like the Kino Flo Diva Lite) will be more like $600-$1000 per fixture.
Fluorescent light banks are more durable than cheap softbox kits, but you need to take extra care with the lamps any time you transport them. Fluorescent tubes break easily. The Kino Flo lights come with a special padded bulb carrier for storing them when not in use.
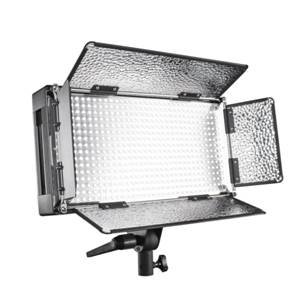 The final option I recommend is an LED light bank. These fixtures are similar in shape to the fluorescent banks. However, there are no delicate glass tubes to mess with and they can very often be run off batteries. LED panels are usually dimmable, with no shift in color.
Low-end LED fixtures will cost $200-$300 each and pro level gear will run $600-$1500 per fixture. These lights may seem like the most expensive option, but that is just the upfront investment. An LED light can have a lifespan of 100,000 hours with very low risk of damage. By contrast, a fluorescent tube lasts about 20,000 hours, and costs about $20. Over 100,000 hours of use you will spend about $200 on bulbs for a 2 lamp fluorescent fixture (assuming you never break a bulb!)
Color accuracy is a big issue with LEDs, so make sure pay close attention to the CRI ratings (90 or above.) Another issue to pay attention to is the type of dimmers used on the light. Cheaper lights can use a Pulse Width Modulation (PWM) dimmer that basically switches the light on and off rapidly to reduce the intensity. The lower the brightness, the longer the ’off’ portion of the cycle. Voltage-based dimmers decrease the voltage going to the LEDs so they glow less intensely without flickering. Some of the better lights have adjustable color temperature so you can shift from daylight to incandescent color settings based on the dominant light I the room (cool but not essential.)
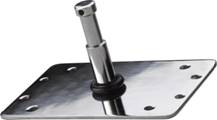 No matter which lighting option you choose for your studio upgrade, I recommend adding some professional grade mounting plates to your studio. These are essentially metal plates with a mounting stud welded on. They can be mounted to walls or ceilings and provide a sturdy place to attach you light.
  They cost between $10-$15 each. There is also a ‘scissor’ mount that clips onto the channels of a drop ceiling. Using these pieces of ‘grip gear’ let you free up floor space in your studio by removing light stands. If you use them along with battery powered LED lights, you can have a complete professional quality studio with no floor stands or cables.
I personally use a Lowel Big-Foot mounting plate that is designed to attach to a drop ceiling scissor mount. My setup is a bit more expensive, but it gives me options when I shoot projects away from my home studio.
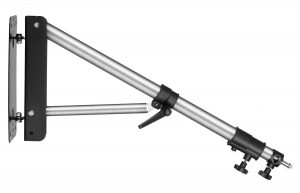 A new option I have recently discovered is the boom arm. This wall-mounted light support gives the benefit of removing floor mounted stands from your home studio while still allowing for lights to be moved around in the space. The arm can extend and retract as well as be raised and lowered. The arm also swings from a hinge on the wall. So, when paired with an LED light, you can position it for a shoot and then swing the entire assembly flat against the wall and out of the way.
Conclusion
Paper lantern lights with CFL bulbs are very versatile. They can be used in many other situations beyond those described in this report, and they make everyone look great. So, cost is no longer an excuse for bad lighting. You now have a viable option.
As your budget allows, move up to better lights that will give you the same great soft lighting with more control and placement options. Don’t be afraid to invest a little money in lighting equipment. Lighting gear holds its value over time better than almost any other video related equipment. I purchased a used set of professional lights over 10 years ago that I still use to this day. They work just as well as the day I got them, and I could probably resell them for 50-75% of my original purchase price. The same cannot be said for the camera, computer, or editing software I was using 10 years ago.
To get the best results with your amazing new lighting setup, make sure your camera is set to ‘Daylight’ or ‘Sunlight’ – the terms are interchangeable and are usually indicated on your camera menus with this icon:
![]()
Many cameras have a setting for overcast daylight as well. If the color temperature of your lights is between 5000-5500K, try this setting to get more accurate skin tones.
Check the focus settings on your camera. Many of the really cheap cameras don’t have auto focus and only offer a fixed focus setting or manual switches to shift from close-up, medium distance, and landscape focal distances. In addition, some higher-end cameras actually have pretty lousy auto-focus software. If your camera’s focus tends to ‘bounce around’ as you move in front of the camera, switch it to manual mode and set the focus by hand.
If the shot is out of focus, there’s nothing that will fix it.
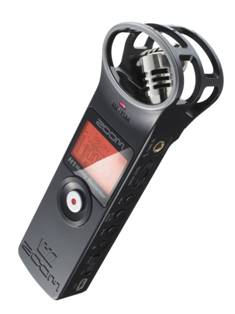 My last tip is to use a lapel microphone if your camera has an audio jack. The closer the mic is to you, the less background noise there will be in your recordings. A trick that wedding videographers and DSLR shooters use is to hook a lapel mike up to a Zoom H1 audio recorder and stick it in your pocket while shooting. You let the camera record a reference audio track and then manually synchronize the external audio recording in your editing software. I use this technique all the time to get great audio no matter what camera I use.
If you can’t use an external mike, then keep the camera close to you, speak loudly, and minimize background noises as best you can.
If you regularly record videos for use online, you can setup a space using the lighting system you just learned and leave it in place. Then, when you need to crank out a video, just comb your hair, switch on the lights, clip on your mike, and you are ready to go.
Do you have any other questions out about lighting for your videos? If you do, just leave a comment below.