Live Honey Bee Removal
When you decide to become a backyard beekeeper you have 3 basic ways to get bees for your hives. You can buy them from someone else, capture a swarm, or go remove them from a location where they are not wanted.
Bee Packages and Nucs

Swarms and Cutouts
Capturing swarms and doing live colony removals (aka ‘cutouts’) are more interesting options to me. You never know exactly what you are going to get. A swarm may have a young queen or an old queen. They may be from a managed hive, or they may be feral. When you find them in the spring, they generally tend to be healthy (because robust hives throw off swarms) and they are free. Catching a swarm can be as easy as shaking them off a tree branch into a cardboard box. However, swarms move quickly and you have to be in the right place at the right time to get one. They don’t always land in convenient places either. Once the bees locate a new home, they move in and start working.

Another approach to catching a swarm is to set out a bait hive (aka ‘swarm trap’) which is a small empty hive box. When the scouts find the box, they go back to the swarm and tell the others. More bees will come and check out the box. Then, if they like it, the whole swarm will move in and start working. The process is a lot like fishing. There is plenty of waiting involved, and the more bait hives you put out, the greater the chances you will attract a swarm. I’ve put out a few bait hives, but never successfully attracted a swarm to one.
Removing a colony of bees from a structure is just about the hardest way to get your hands on some bees. So, of course, that has been the primary way I’ve gotten bees so far. This is referred to as a cutout.
On the plus side, with a cutout you get an established colony with plenty of workers, developing brood, and (if you are lucky) a healthy queen. If the owner of the structure didn’t do anything foolish like spray poison into the hive, you might even get a lot of tasty honey (click here to read about the first live bee extraction I did back in 2015.) However, the process is messy and exhausting. You have to cut open walls or ceilings, carefully remove the brood comb and place it into a hive box without damaging it too badly, and clean up a ridiculous amount of honey and nectar. In the end, you might not find the queen and have to hope and pray that the workers can raise up an emergency queen from the existing brood (unless you happen to have a spare queen laying around.)
This year, 2016, I was not able to successfully capture a swarm. So, I decided to offer my services to do a live bee colony removal again. A family down in Pelham, Alabama contacted me in early June, and I packed my gear and set to work. Here is what happened.
June 2016 Bee Colony Removal
I started by driving over to the house to do an inspection. I had gotten an email shortly before noon and called the homeowner during lunch. The description of the bee activity at the house made it sound like a good prospect, so I arranged to stop by after work.
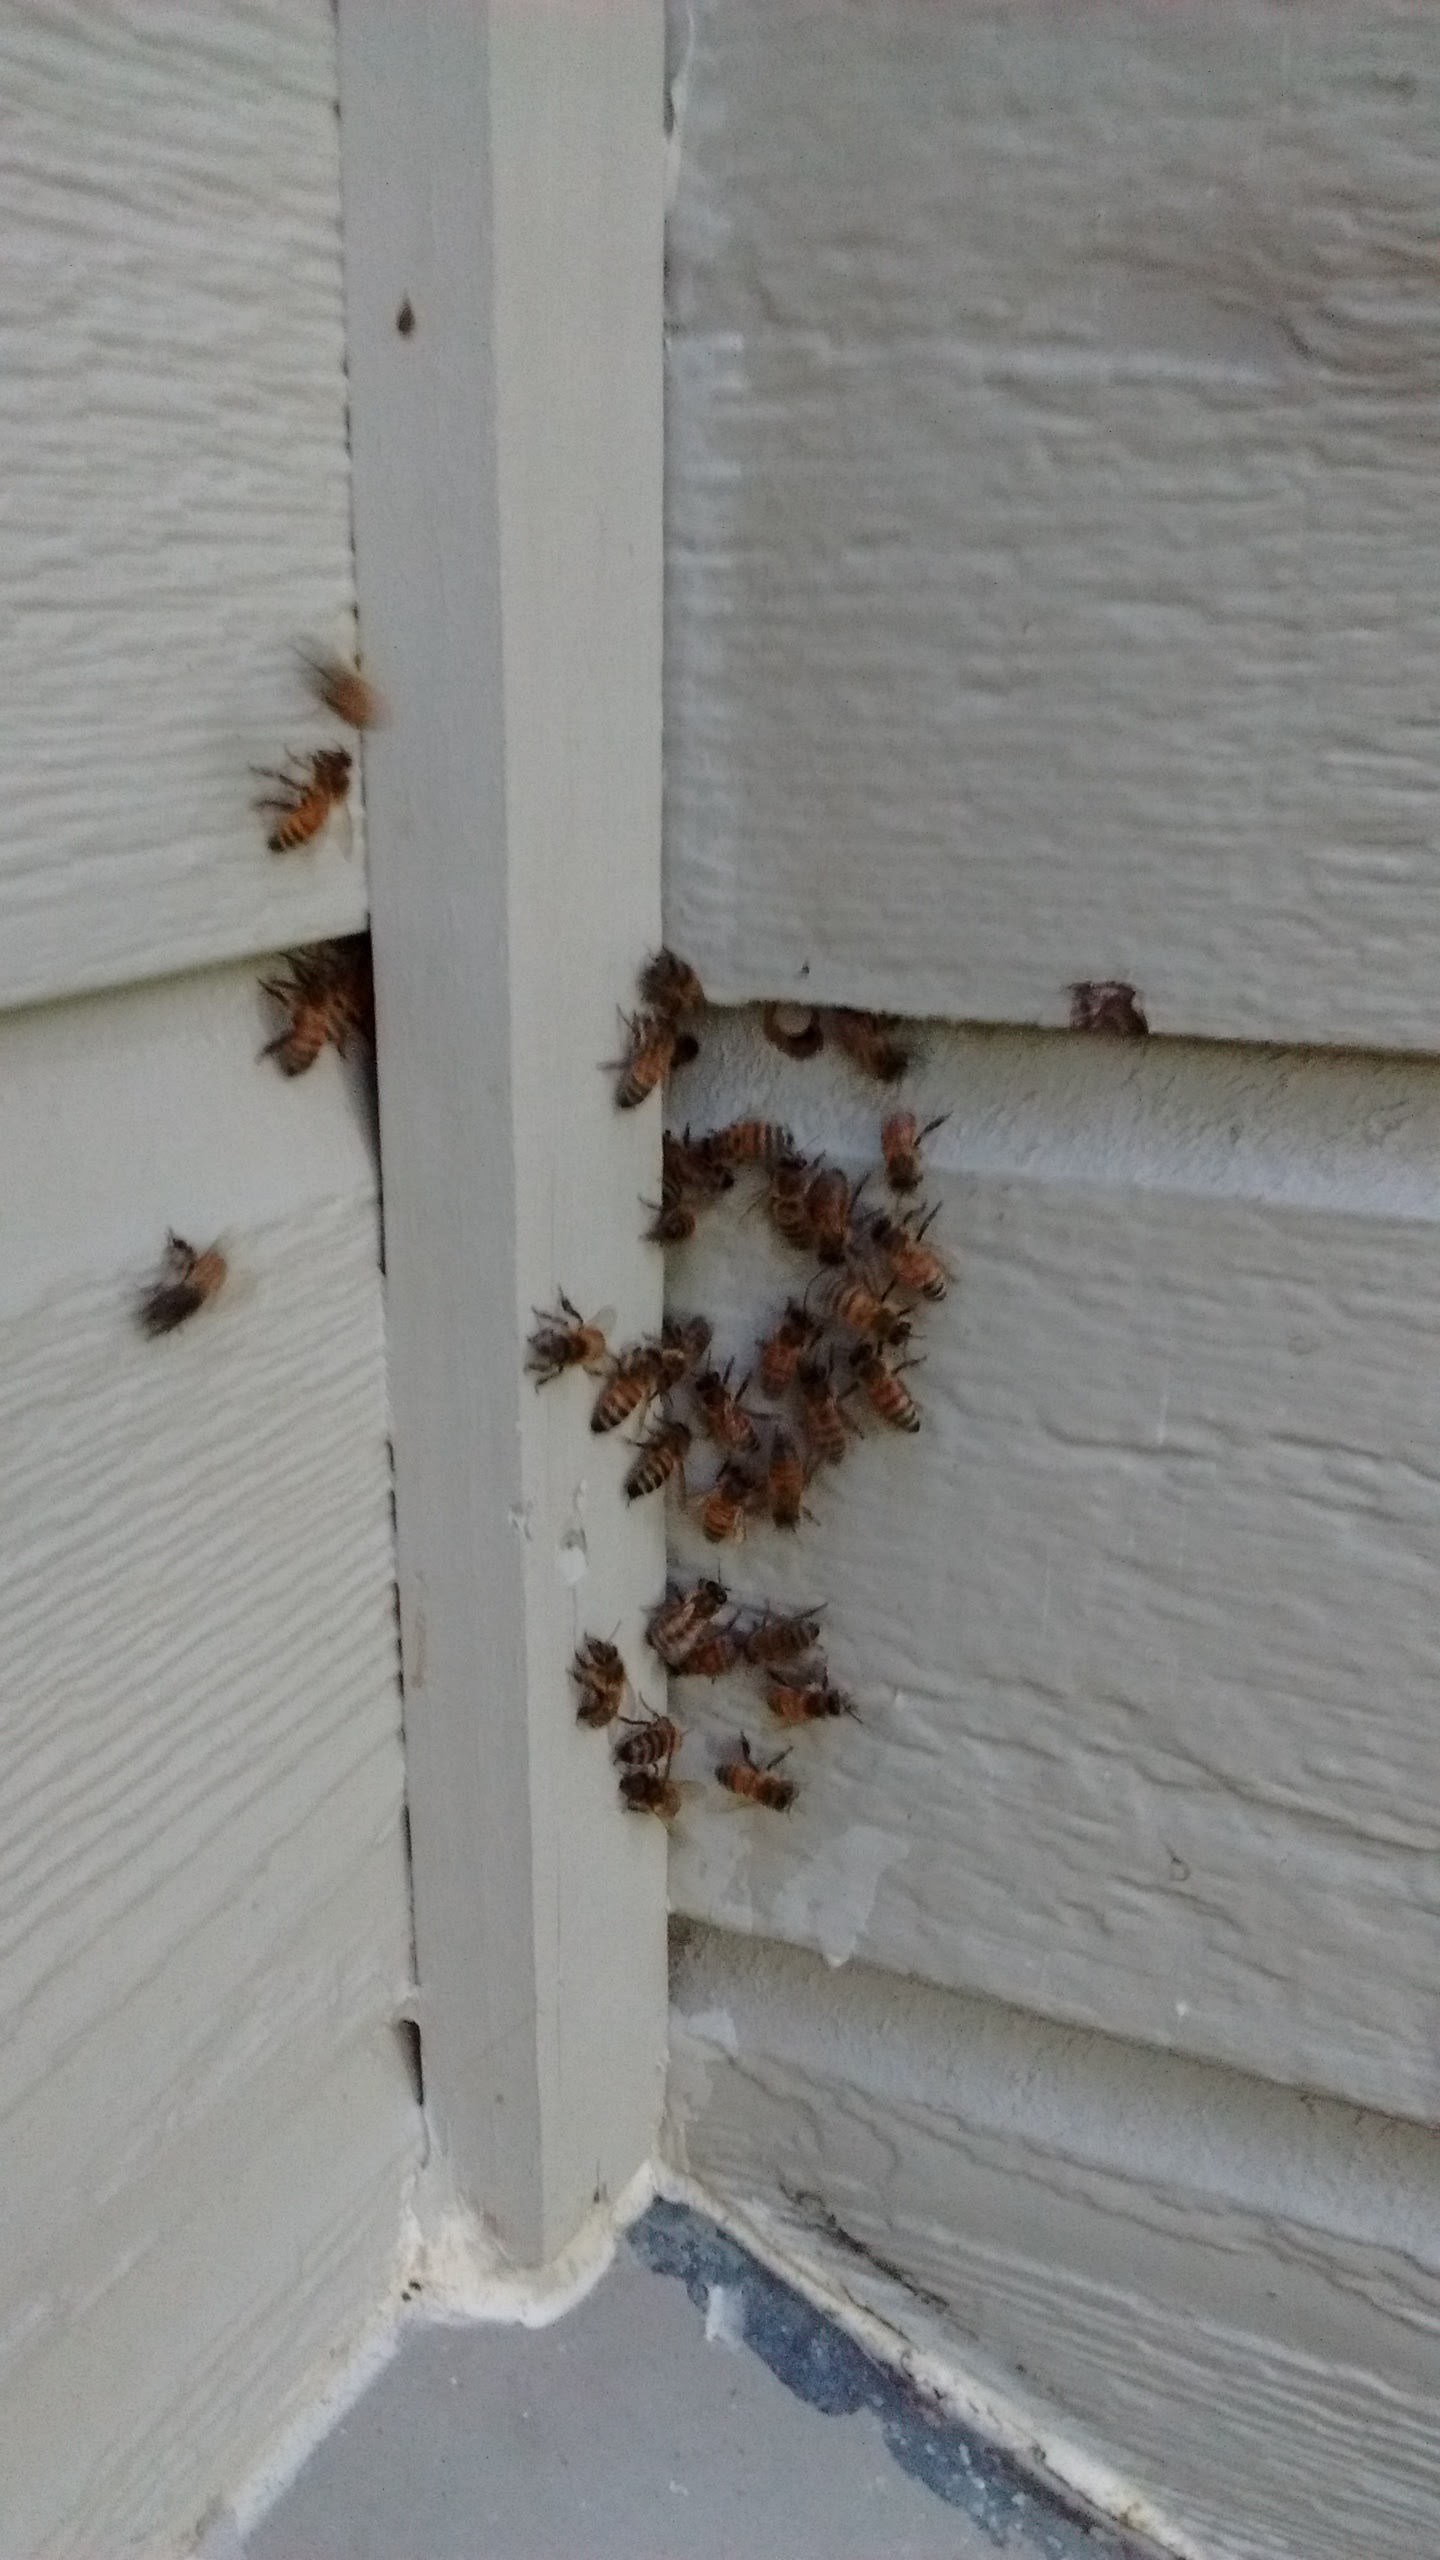
The house was 2 stories with a walkout basement built into a hill. There was a fireplace on the left side and also a covered porch. The bees were entering the wall behind a piece of trim at the corner where the fireplace chimney met the side wall. Their primary entrance was above the porch roof, but some bees were entering the structure through a crack in the soffit under the porch roof a little further down the wall.
I couldn’t tell where the bees were going inside the wall. I pulled back the trim board, but still couldn’t see where they were going. I didn’t want to remove any more of the siding until I had my gear and was ready to do the removal.
If you plan to do this kind of work with any regularity, it is worth investing in a thermal camera. Bees generate a lot of heat, so thermal cameras can make it much easier to locate the colony inside a covered wall. In this case, I wished I had one.
The good news was that it looked like the bees would be relatively easy to reach – if they were in the wall or the soffit. The walls were covered in Masonite hardboard siding, which is pretty easy to cut. However, the area where I would have to work was on the downside of the hill which meant I would be 2 stories up on a ladder. This turned out to be less of a problem than I anticipated.
My Live Bee Removal Toolkit
I used the same basic toolkit from my first colony cutout in 2015. I had my smoker and jacket with an attached veil. I had a serrated bread knife to cut the comb, and a hair clips and zip ties to attach the salvaged brood comb to the bars in my small bait hive I used to transport the colony back to my top bar hive at home.
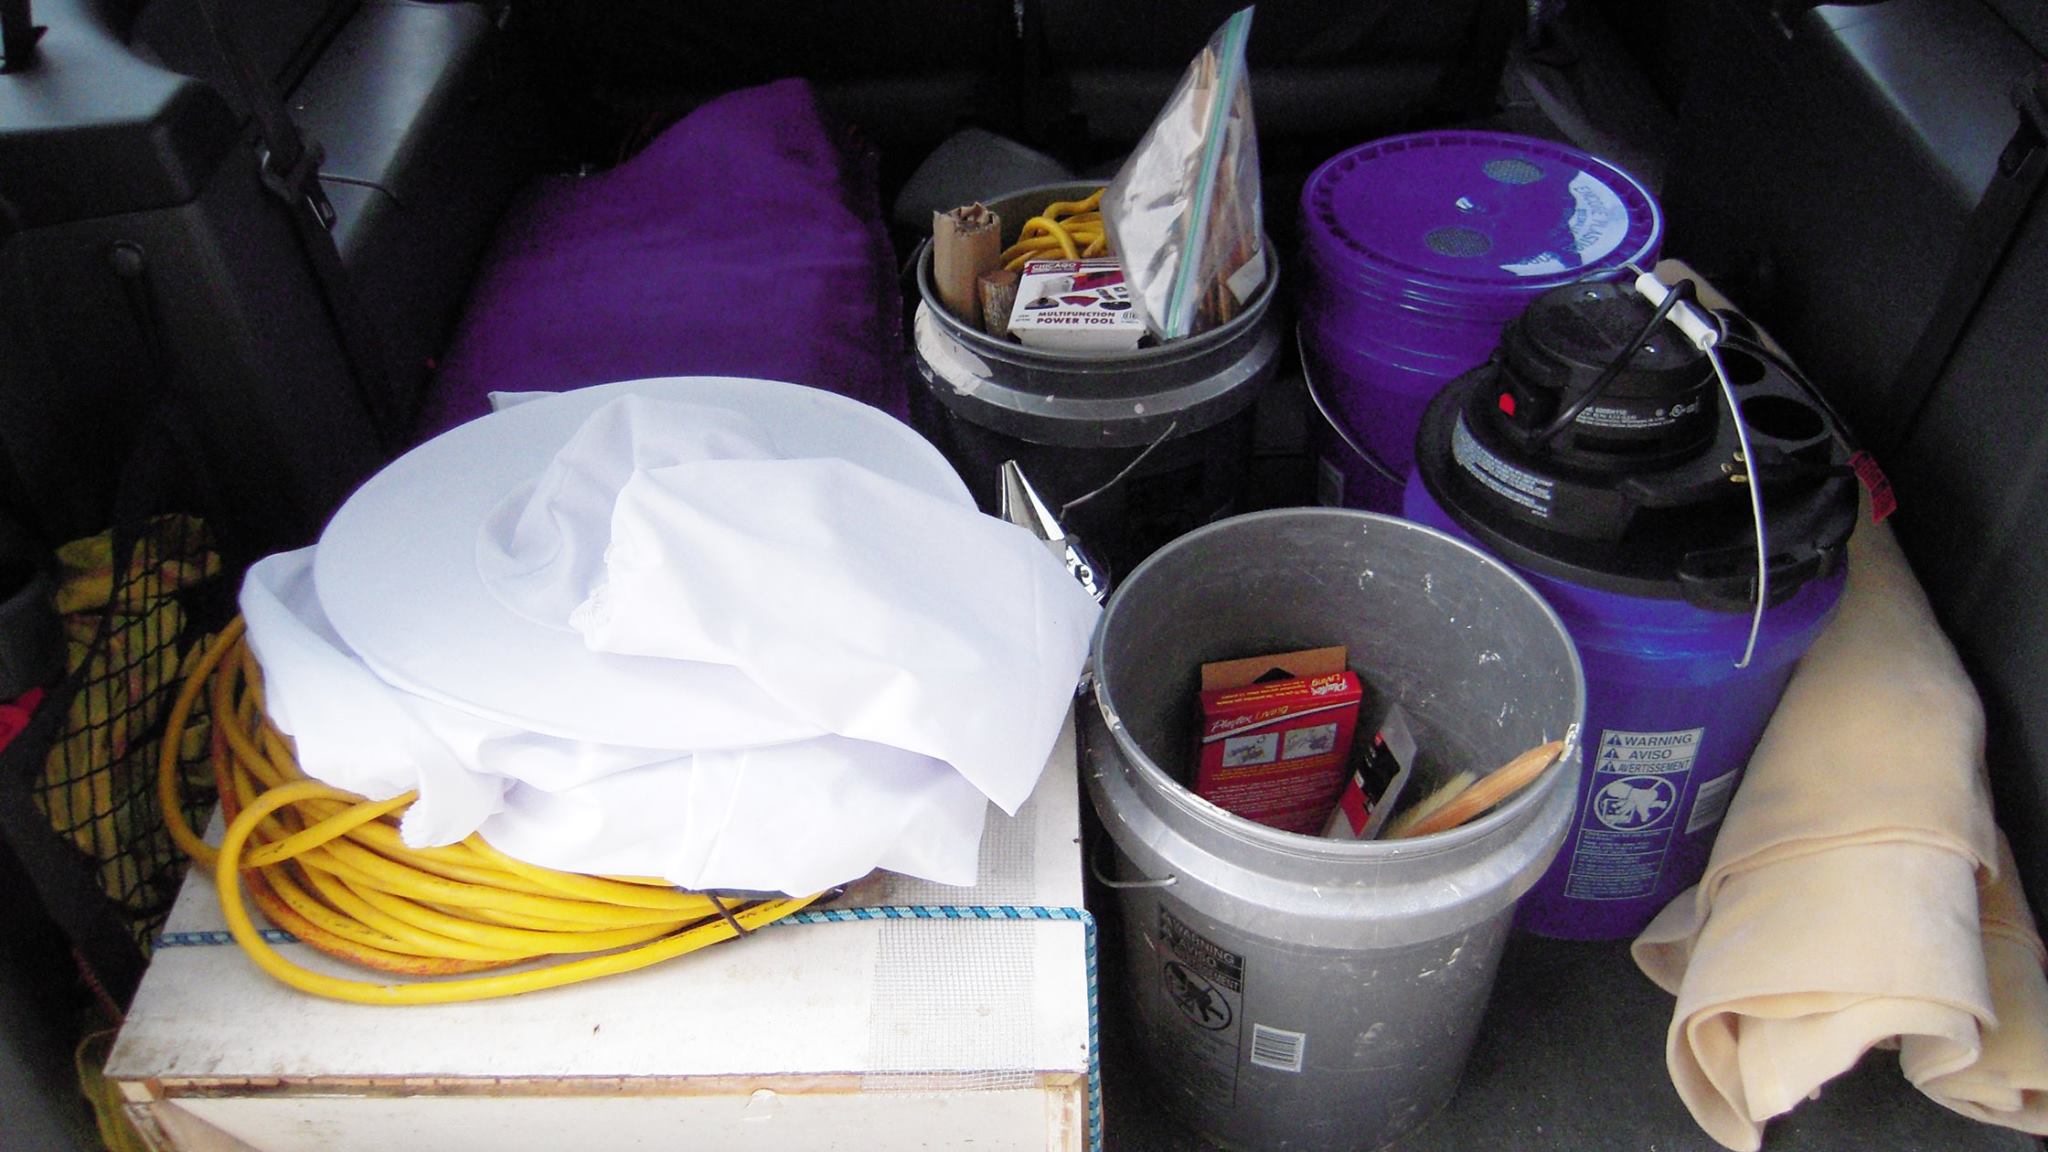
The only significant change in my gear was a modification to the bee vacuum I had created. The basic vacuum consists of a 5 gallon bucket with a bucket head vacuum attachment. My plan last year was to suck the bees into the bucket and then put a vented lid on it for transport. This didn’t provide enough ventilation and the vacuumed bees died. My revision was to use 2 buckets. I cut 2 large square openings on the sides of one bucket and covered them in #8 hardware cloth. This provided lots of ventilation during transportation. To create a vacuum seal I place the ventilated bucket inside another uncut bucket. When I was done vacuuming, I simply pulled the buckets apart to allow the air to flow through the screen vents. It was a simple solution that worked like a charm. The vast majority of the bees survived the process.
Finding The Colony
It was easy to see where the bees where entering and exiting the wall of the house, but locating the actual hive was a lot harder. I cut away some of the siding from the chimney first. They were not there. So, I began to cut back some of the siding from the side wall of the house. Instead of finding an open wall cavity behind the siding, I found the rim joist that forms the outside of the structure that creates the ceiling of the first floor and the floor of the second floor. Now it was decision time.
The bees were either in the soffit of the porch roof (below the main entrance of the hive), in the outside wall of the house above or below the rim joist, or inside the living room ceiling.
Before cutting any more holes in the siding, I decided to cut a small plug out of the rim joist and look into the cavity behind it. When I pulled out the plug I immediately saw comb and bees. They had setup their hive in the living room ceiling next to the fireplace.
If I had owned a thermal camera it would have been easy to locate the hive without any cutting. And, I would have avoided what came next.
Developing a New Live Bee Removal Plan
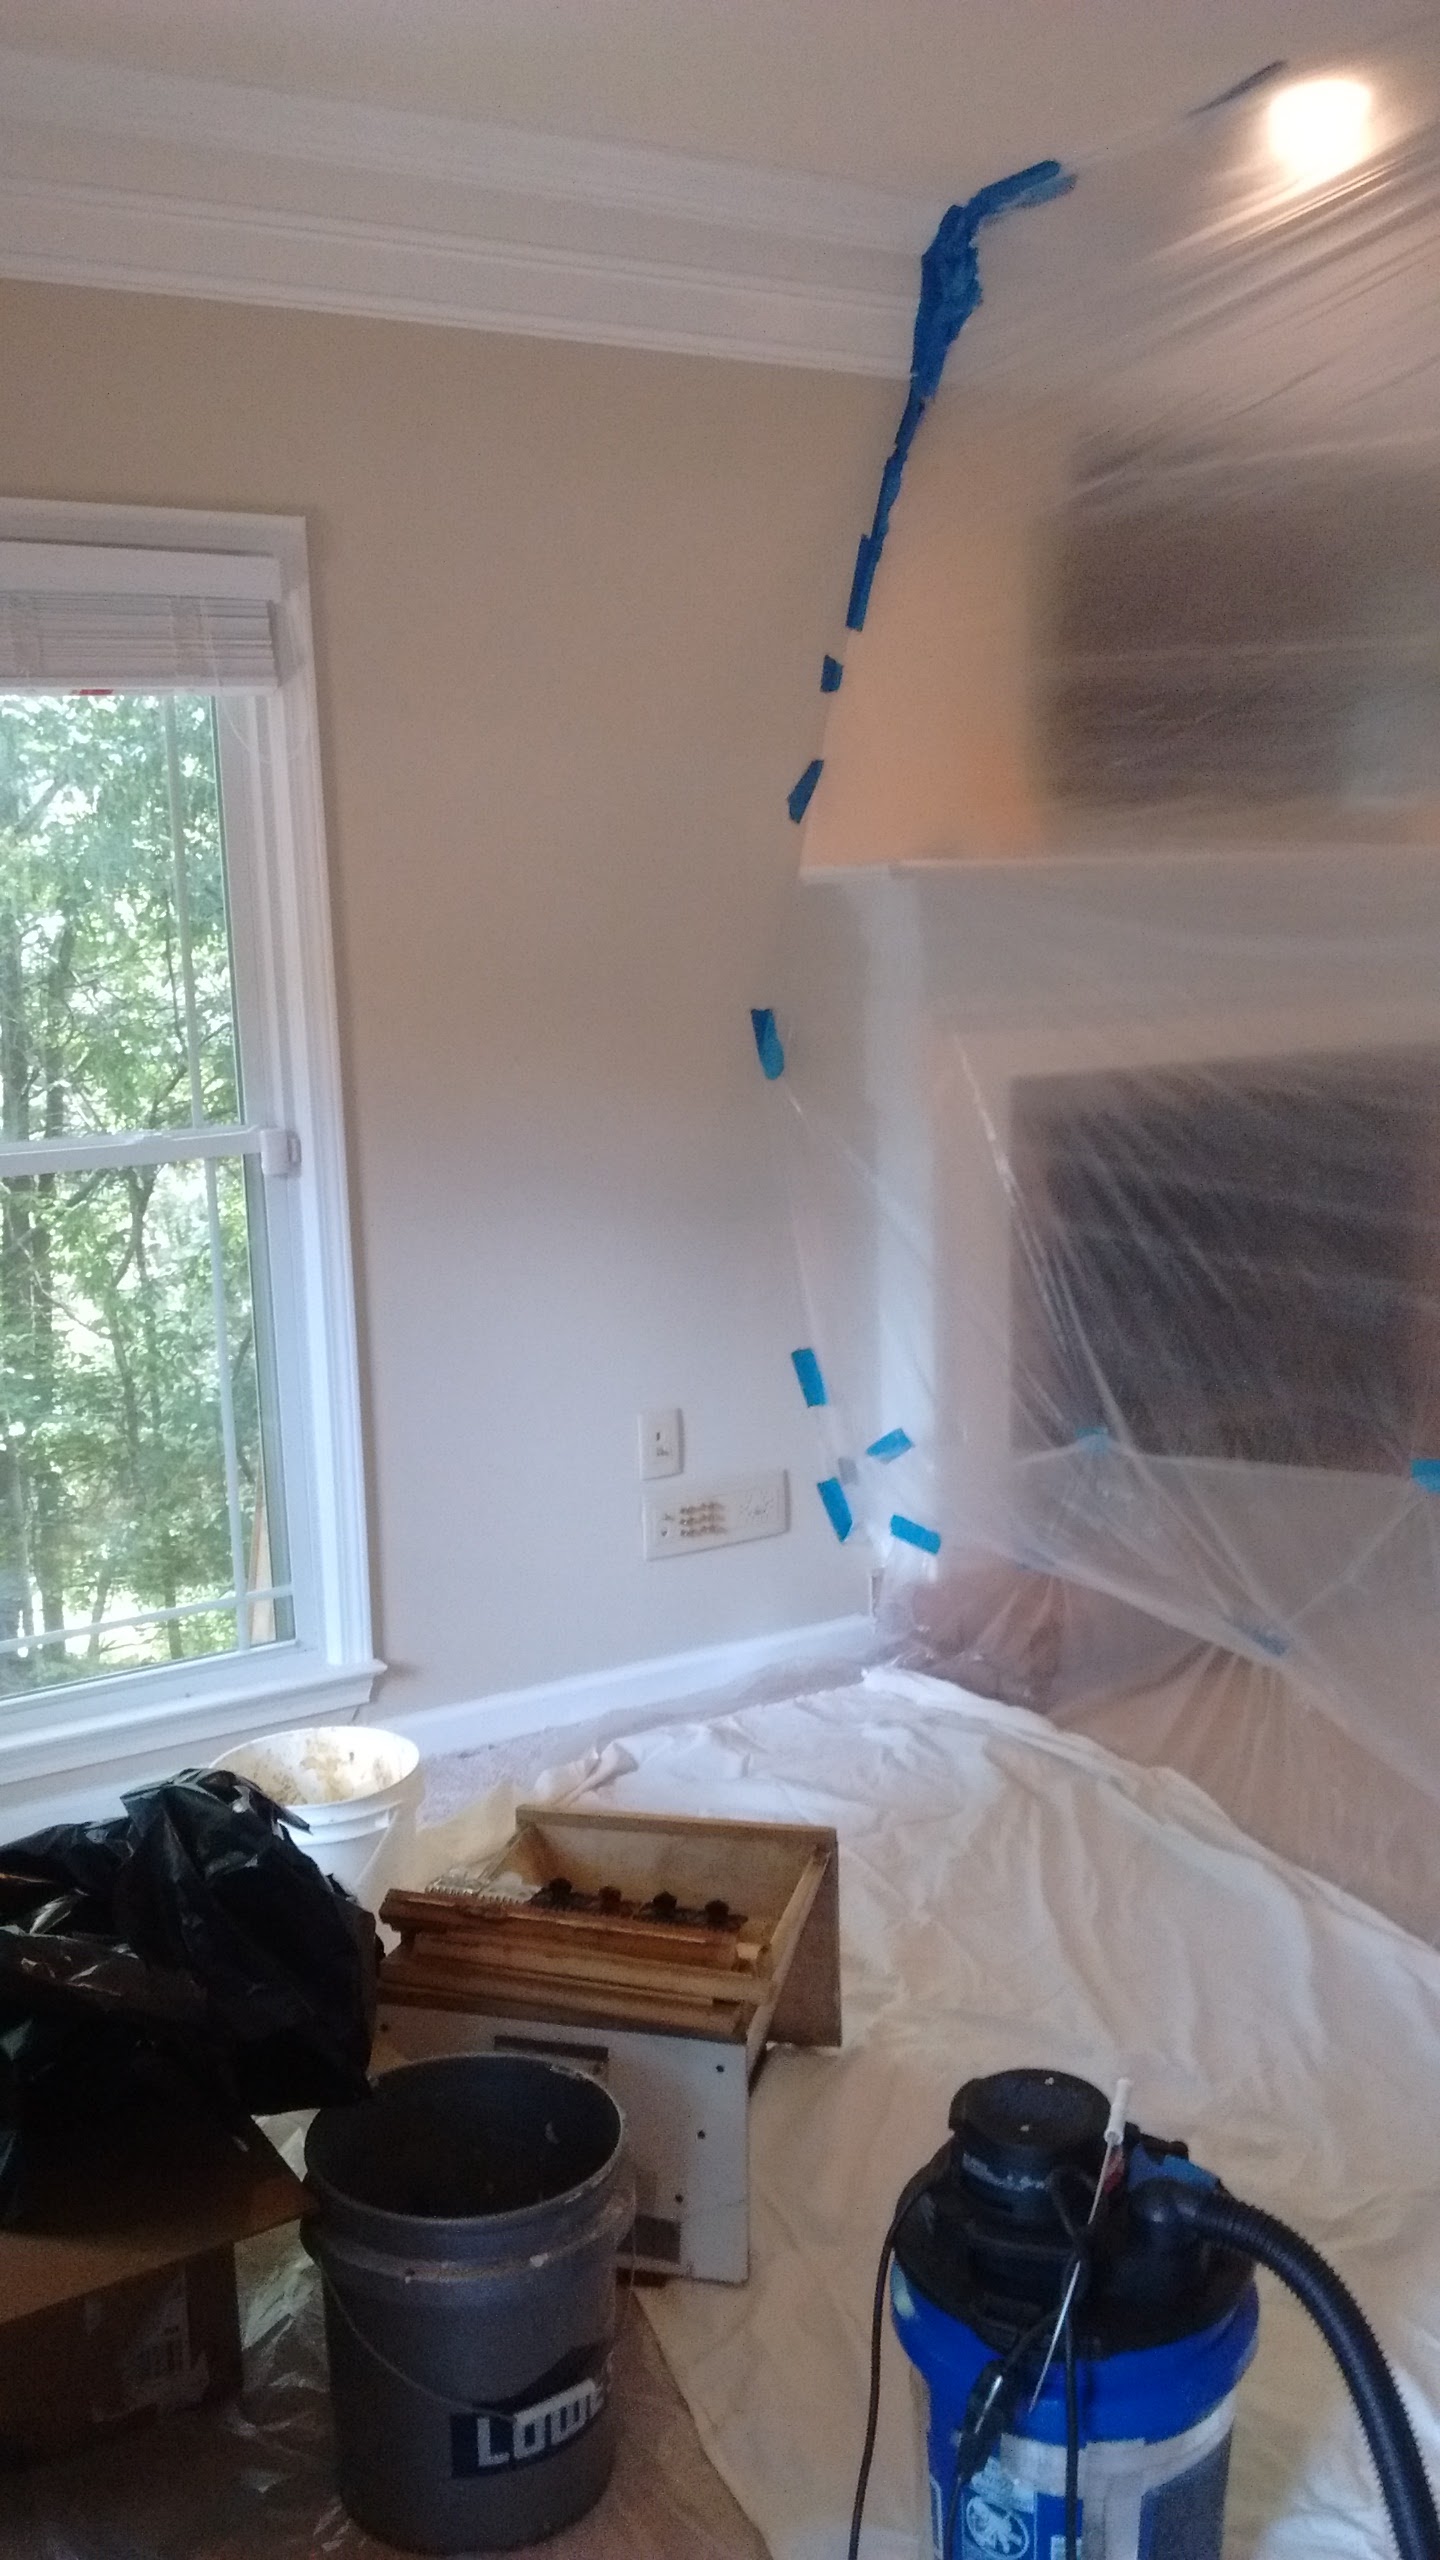
Removing bees from inside a house is a lot different than removing them from the outside. The process is very messy (the honey and nectar get on everything.) Also, the bees are going to fly around, and you don’t want them all over the house. So, I had to come up with a revised plan.
First, we cleared out all the furniture from the front half of the living room. Then, we took several plastic painter’s drop cloths and attached it to the ceiling to create a walled-off area to contain the bees. I also put a cloth on the floor and then covered it with an old white bed sheet I keep with my gear.
Once I started working I was basically trapped in this area until the job was done. So, I made sure to bring in everything I would need before cutting open the ceiling – including a bucket of water to rinse the honey off my hands and tools, garbage bags for discarded comb, and a supply of granola bars and Gatorade to keep myself fed and hydrated.
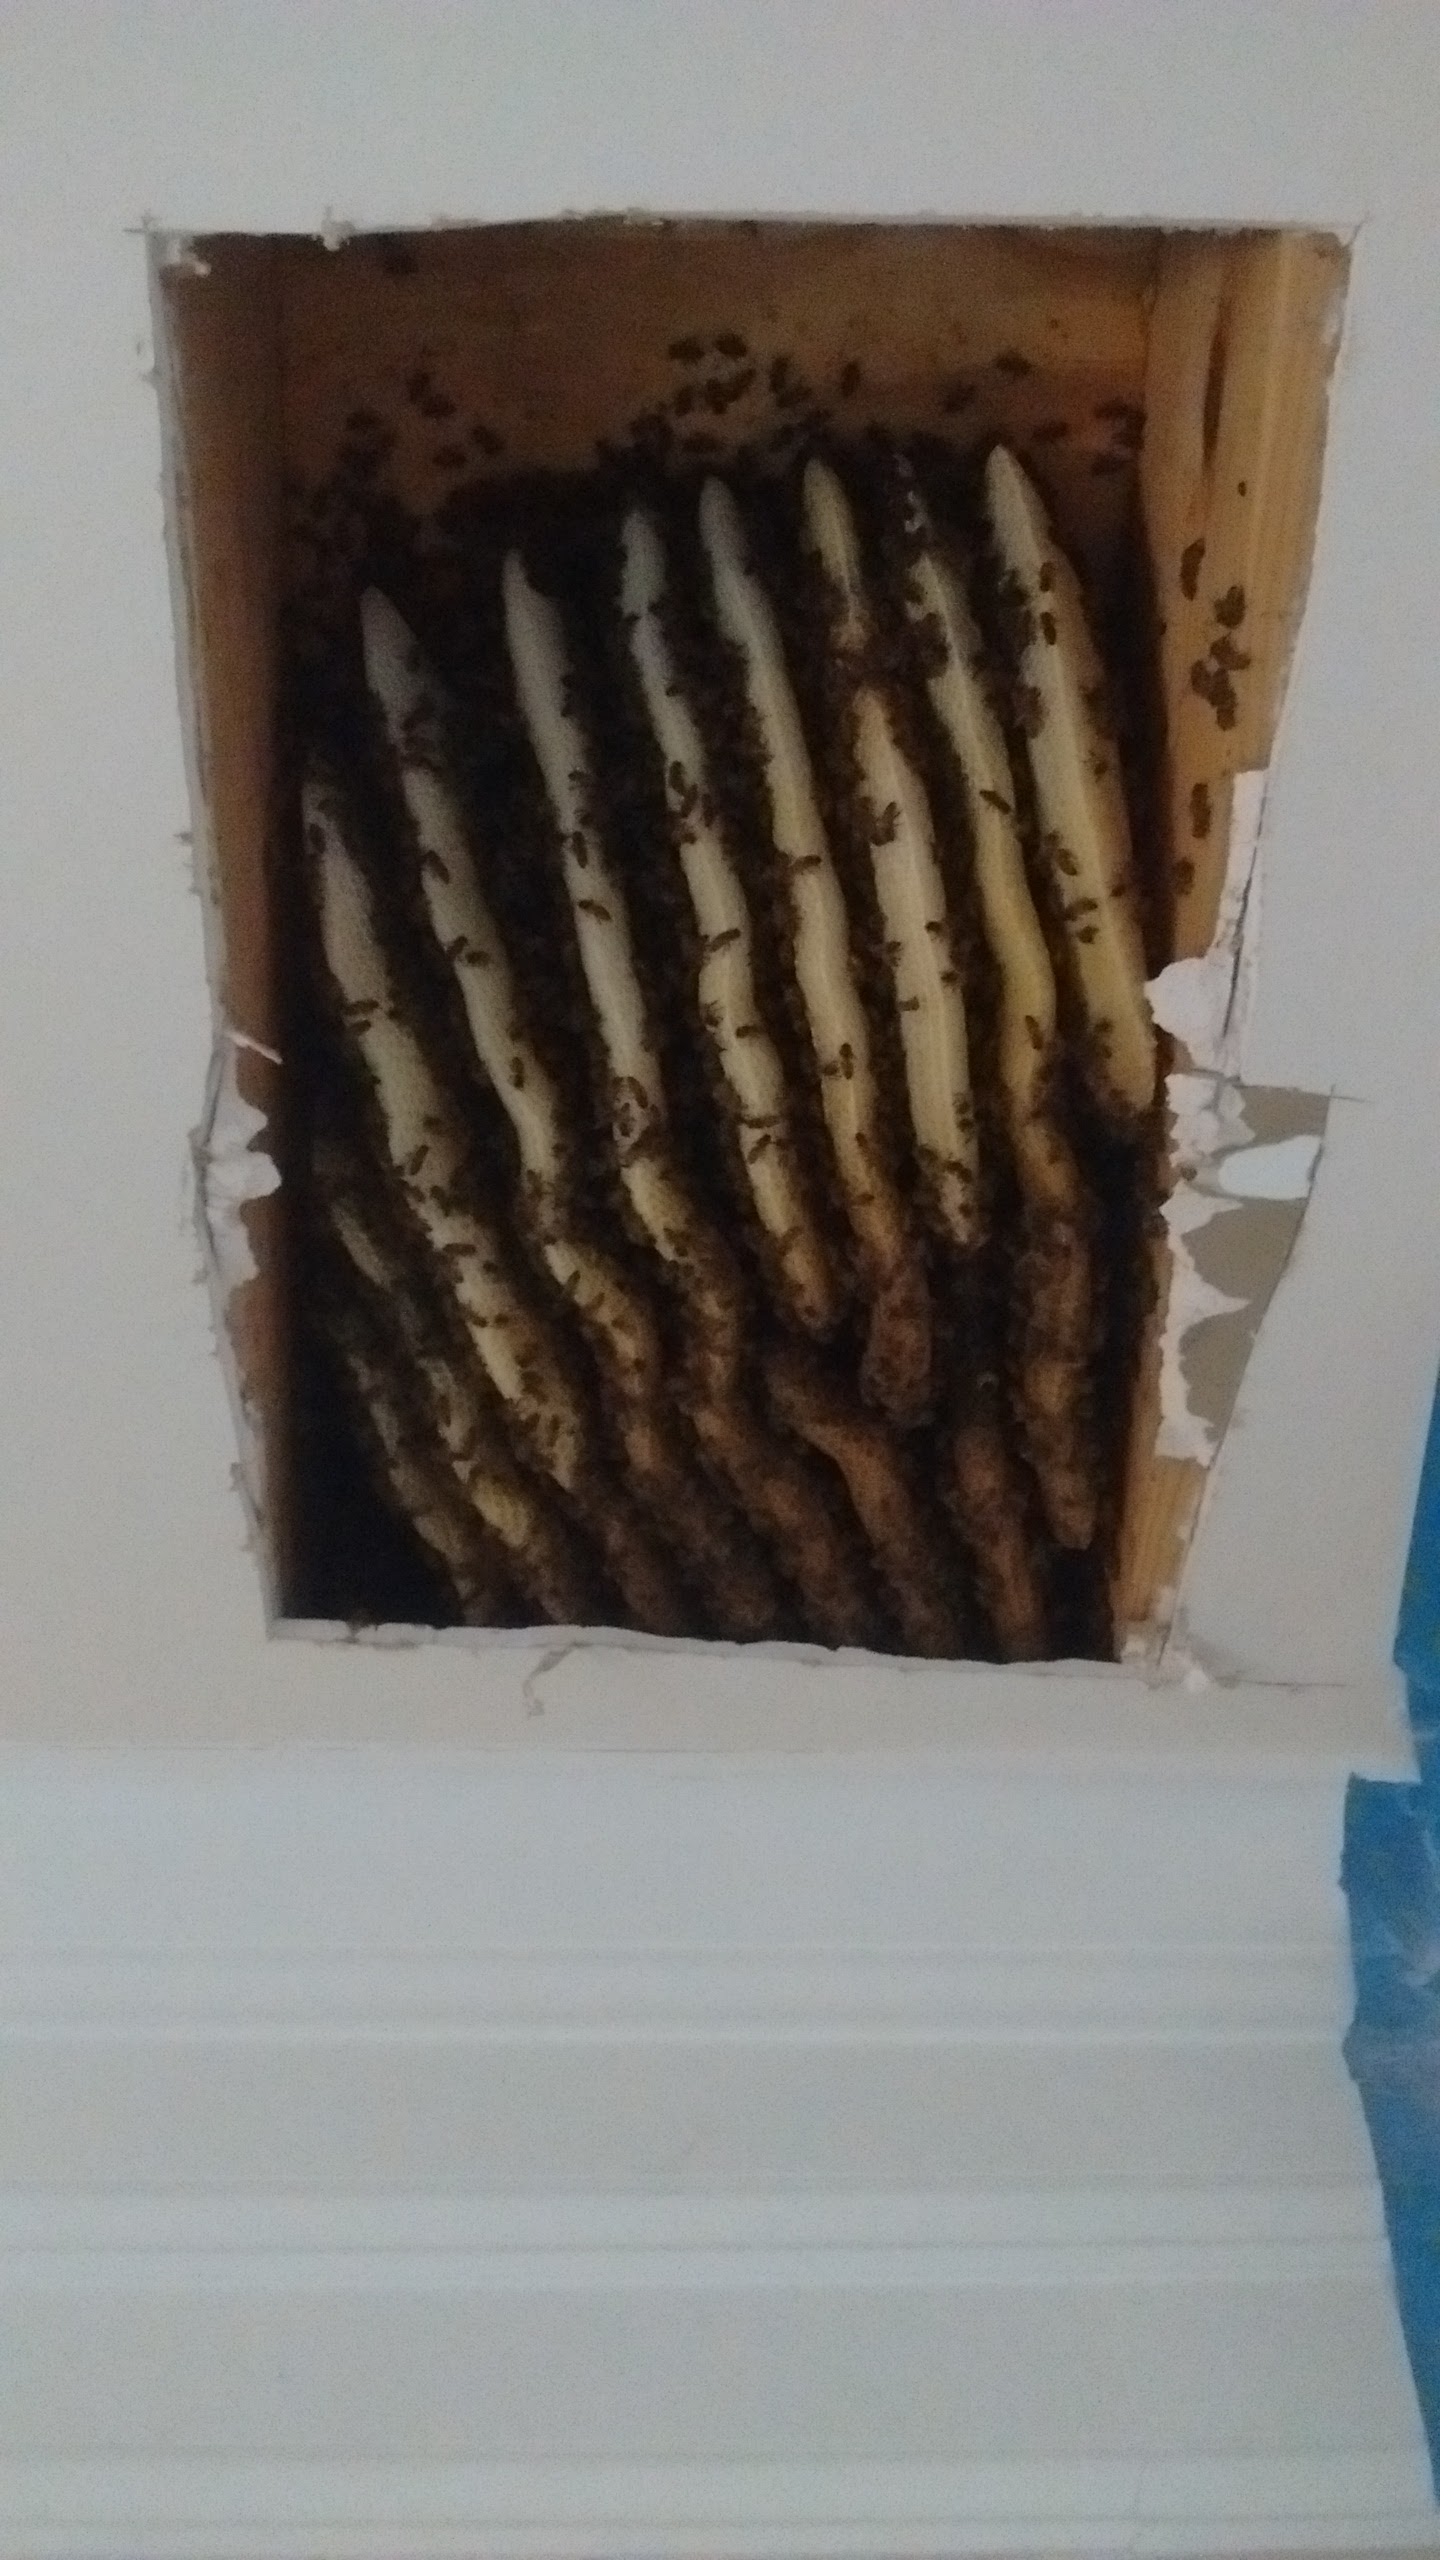
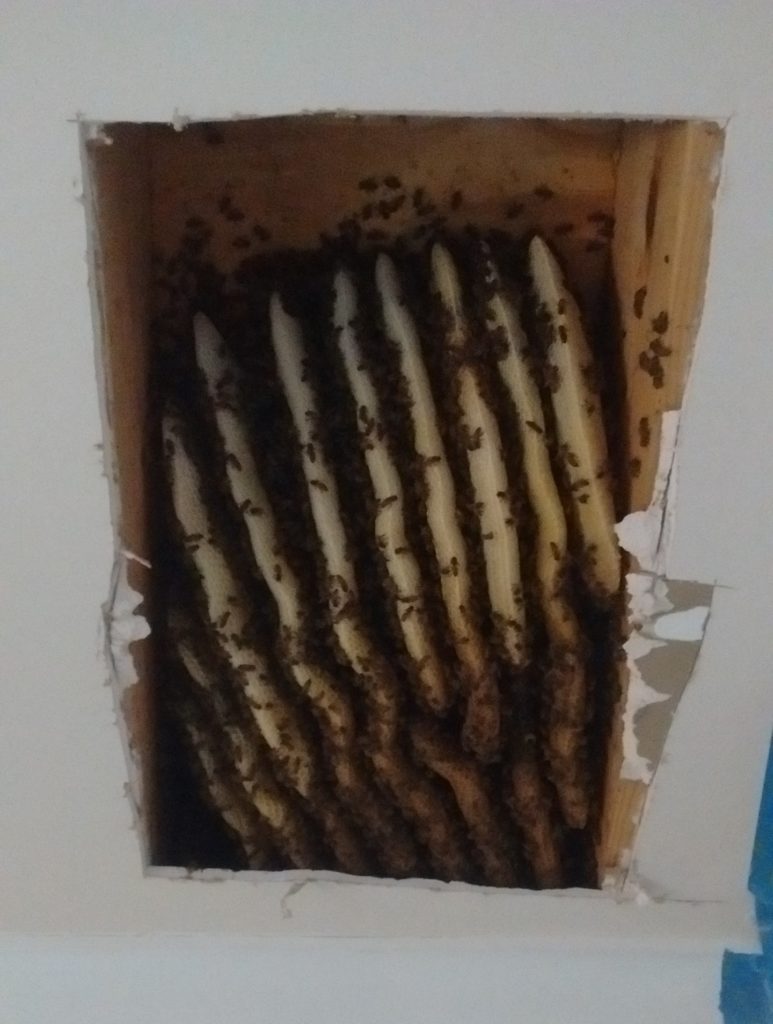
Once I cut open the ceiling, I could see the hive. It was a pretty large hive and the comb looked pretty fresh, so I think they moved in during the spring swarming season.
I made a critical error during this hive removal. The most important one was that I didn’t block the outside entrance to the hive. As you move through the hive and take out comb, the queen retreats. In this case, she must have run out of the hive through the entrance as I was removing comb.
If I find myself in a situation like this again, I will use some expanding foam insulation to fill in the entrances to block the queen from escaping or place a cage made of wire mesh over the entrance so the queen would get trapped outside where I could collect her at the end of the process.
My Results
I successfully removed the colony from the living room ceiling of this house. However, I did not locate the queen.
My modified bee vacuum worked great. I was able to collect a significant portion of the worker bees with very high survival rates. The colony arrive in their new home with sufficient numbers.
Since I did not find the queen, the colony had to raise up an emergency queen. I located a local beekeeper who was willing to give me a fresh frame of brood comb from one of his strong hives. But, that created a new problem for me.
At the time, I was using a top bar style of hive. It’s super easy to make, and easy to manage for the backyard beekeeper. But, you can’t easily exchange equipment with people using a traditional Langstroth style hive.
The frame of brood I got for the colony to use wouldn’t fit in my hive. I had to do some fancy work to fit it into the top bar hive. They successfully created several queen cells. But, as the new queens were emerging, the workers started building new comb connected to the brood frame I had rigged up inside the hive.
To keep the bees from making a mess of the comb inside the hive, I decided to pull out the borrowed frame of comb as soon as the queens had hatched. The bees did not like that intervention within 24 hours, they swarmed and left the hive.
Lessons Learned
I went through a lot of work to acquire that colony of bees only for them to turn around and leave. That was a very disappointing result.
This experience convinced me to abandon top bar hives. Working with standardized frame-based equipment makes it much easier to do cutouts and manage the hive when you need to do things like source a frame of brood from another beekeeper.
Top bar hives are fantastic for backyard beekeepers who plan to work with swarms or package bees. But, they introduce a lot of challenges if you starting doing things like cutouts or managing a larger apiary.
Moving forward, I plan to use a horizontal Langstroth hive which provides the convenient management of a horizontal hive with the structure of frame-based comb. It may be the best of both worlds for me.
